
Java is an object-oriented, memory-safe, platform-independent, general-purpose programming language popular among programmers who develop applications and services. It is an extremely transferable programming language used across platforms and different types of devices. It is a fast, secure, reliable language for coding everything from mobile apps to creating websites. It is also used for creating smartphones, smart TVs, Internet of Things (IoT) devices, gaming, big data, distributed, and cloud-based applications, among other types.
This blog will discuss how to install Java JDK 23 on Windows 11 step by step. You’ll also learn how to set up the JAVA_HOME environment variable to ensure Java works properly on your system. This guide is perfect for beginners and developers wanting to start with the latest Java version.
Continue reading!
How do you install Java 23 on Windows 11?
Java JDK 23 is the latest version as of now. Start by opening the Chrome browser, and in a new tab, type download Java 23 for Windows 11 and hit enter. You will find a Java downloads link as shown in the image below:
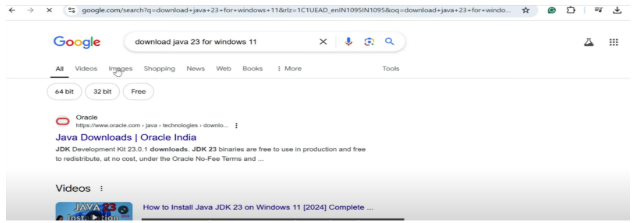
Click on the Java downloads link. This will head over to the official website’s download page.
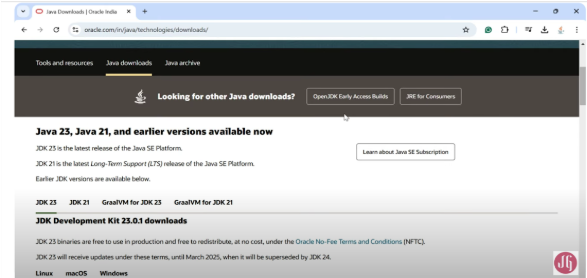
You will find here Java 23 for different operating systems like Linux, macOS, and Windows. Click on the windows. You will see the following:
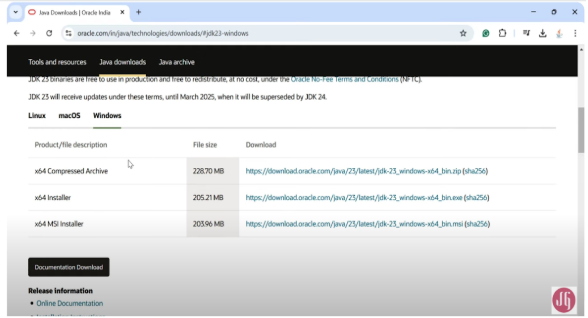
The x64 Installer is for Windows 11. So, click on the .exe file, and you will notice it is downloading. Wait for a couple of minutes to complete the download.
When the file is downloaded, click on the link. This will open the installer, as shown in the image below.

You can see the message here: Welcome to the installation wizard for Java. Click on the next button. You will see the following message:
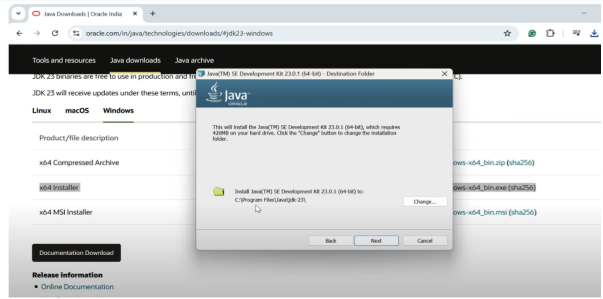
Now, choose the installation directory. Here we choose the default one, that is C:\Program Files\Java\jdk-23\ .
Note: If you want to change the directory, you can do it by clicking on the change button.
Now, click on the next button.
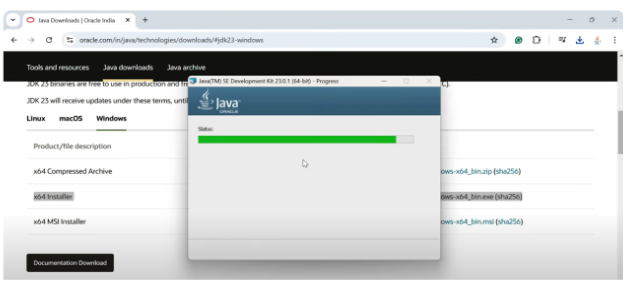
Here, installation has started, just wait for a few seconds. And there we go with the following screen:
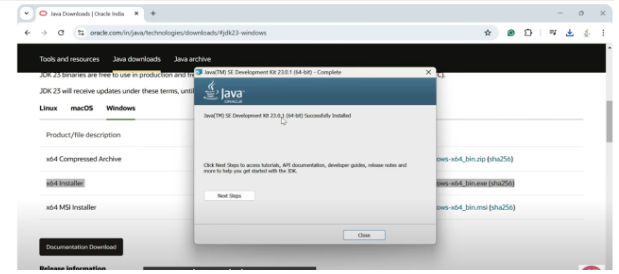
The installation is successful. Click on the close button.
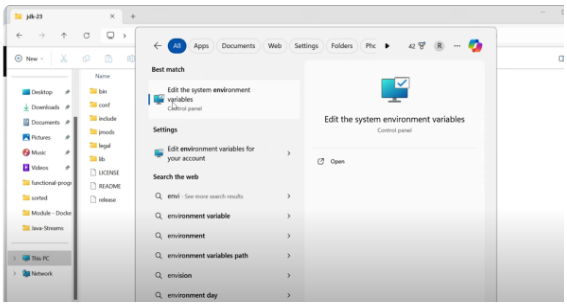
Now, go to the file system and go to the C drive. Go to the program files, then the Java folder, and there you will find jdk-23, the file that you have downloaded. Copy this directory, go to the Start menu type Env, and click on the “Edit the system environment variables”, as shown in the image below:
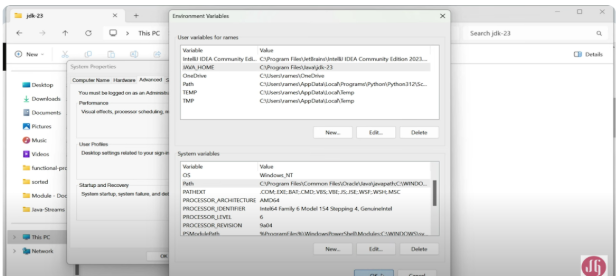
Next, click on the environment variables as shown in the image below:
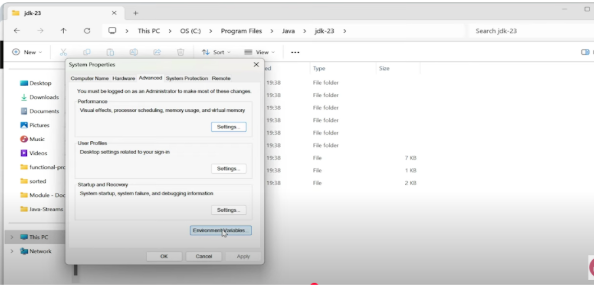
You will see the following screen:

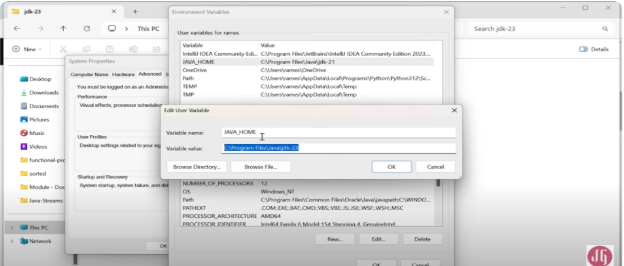
Go to the user variable section. So here, we have already added Java home for java\ jdk-21. Edit it and type the variable name as java_home and the variable as the new path, that is C:\Program Files\Java\jdk-23 as shown in the following image ( Note: it is our jdk-23 installation directory path):
Click ok and see the following image on your screen. Next, go on to the system variables section.
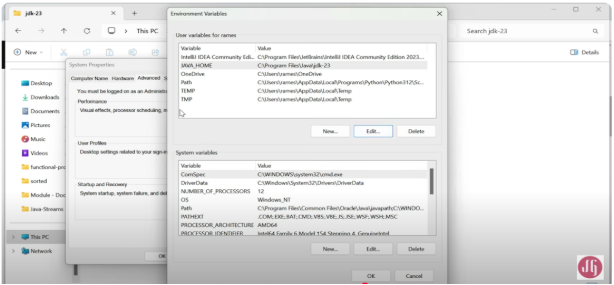
Go to the path and click on the edit button.

After clicking on the path, you will see the following image on your screen. Now click on the new button.
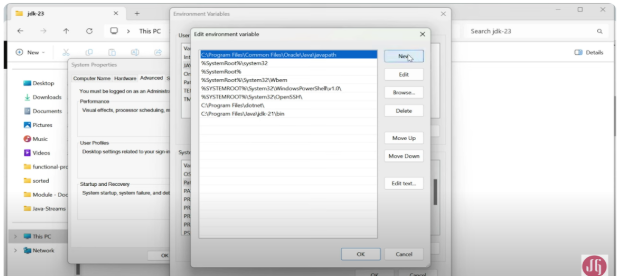
You can now paste the installation path directory here, that is, C:\Program Files\Java\jdk-23. Append it with “ \bin ” as shown in the image:
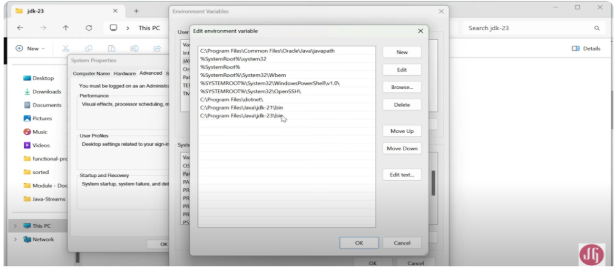
Note: We had C:\Program Files\Java\jdk-21 in our system, we will delete it and add C:\Program Files\Java\jdk-23 to our system by simply clicking the ok button. Once you click on the ok button, you will see the following image on your screen:
Click again on ok. You will see the following image on your screen.

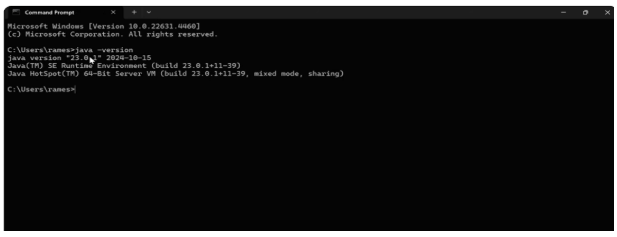
Click again on ok. Now, let’s open the command prompt. After you open the command prompt, type “ java - version ” and press Enter on your keyboard. And you can see Java version 23 installed on your computer, as shown in the image below:
This is the Java version that we have successfully installed. Now, let’s use the jshell tool. For that, type the following command in your command prompt: “ jshell ” and click on the enter on your keyboard. Here, type the statement System.out.println(“Hello world ! ”) and hit enter to see the output “Hello world !” as shown in the following image.
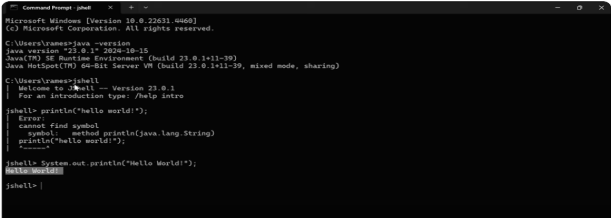
So, this is how you can use JSL to test Java installation quickly.
Congratulation! You have successfully installed Java 23 on Windows 11. You are ready to use one of the best programming languages and development platforms that reduce costs, shorten development timeframes, drive innovation, and improve application services.
