
When it comes to relational databases, MySQL has long been a favorite among developers and DBAs worldwide. MySQL 8.4 is a Long-Term Support (LTS) release within the 8.4 series. It indicates a stable version with extended su port and prioritized bug fixes, making it a recommended choice for production environments seeking reliability. Users can expect the MySQL community to provide extended support for this version, including security updates. Because of its stability and support, this version is frequently regarded as excellent for production environments.
To install MySQL 8.4 on Windows 11, navigate to the official MySQL website, download the MySQL Installer for Windows, and run the executable file. Select the installation option and follow the on-screen prompts to set up and install the database server. For further security, make sure you set a strong root password during setup.
Also, here is how to install MySQL 8 on Windows.
Detailed Installation Steps for MySQL 8.4 on Windows 11
1. Go to the MySQL website: https://www.mysql.com/
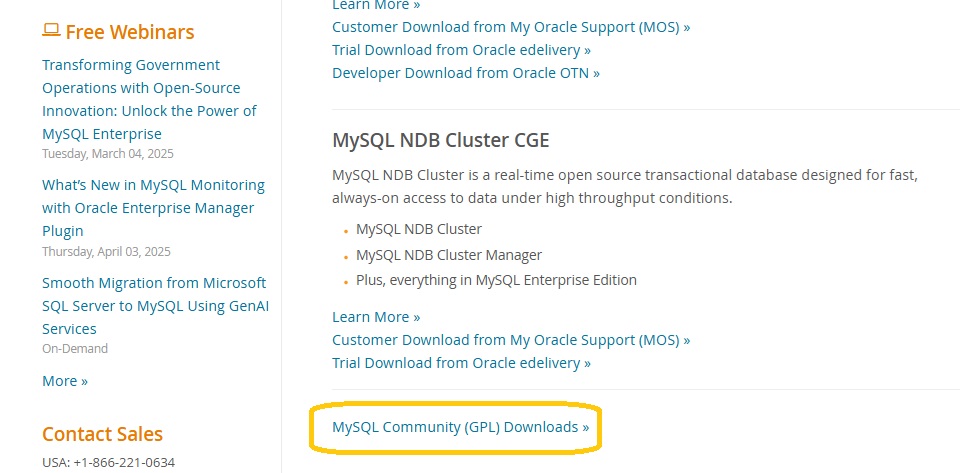
2. Click the DOWNLOADS option in the menu bar, then select ‘MySQL Community (GPL) Downloads’.
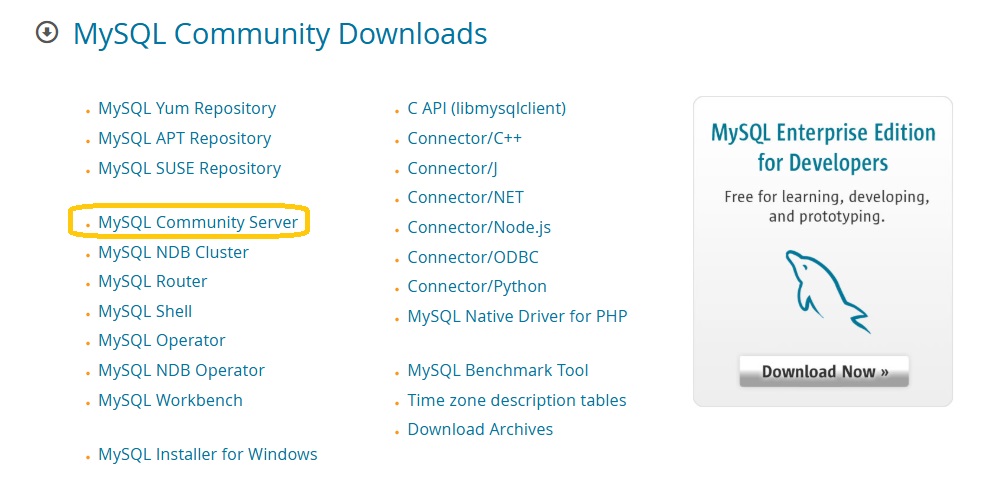
3. Clicking the above link will open the MySQL Community Downloads window. From there, select the MySQL Community Server option.
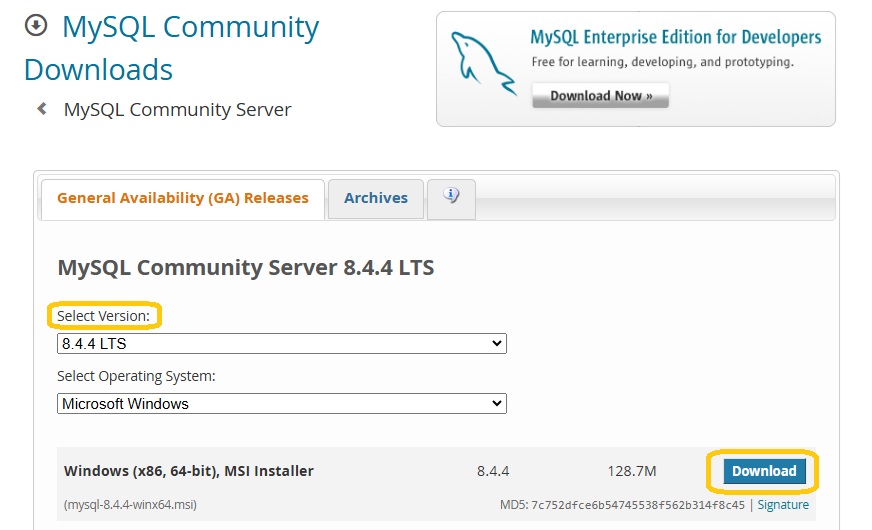
4. Select the desired MySQL version from the drop-down menu, then choose the Windows (64-bit) MSI Installer to download the installation file.
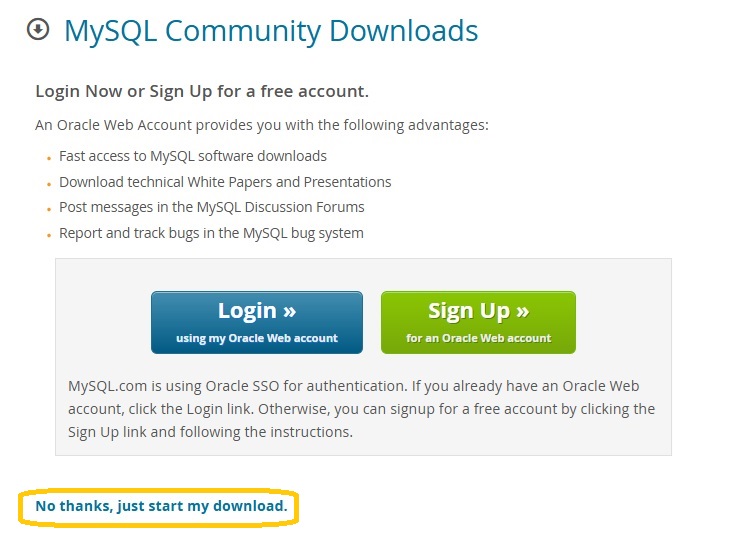
5. Now, click the Start My Download link to begin downloading the MySQL installer file.
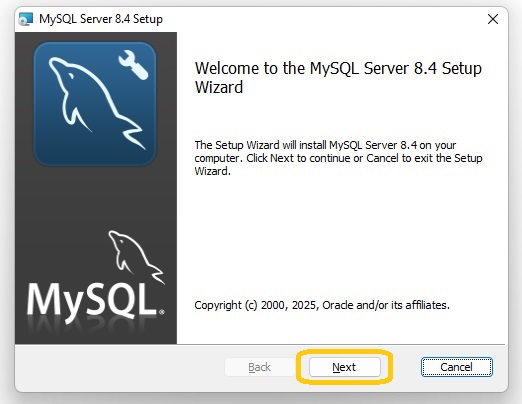
6. After downloading the file, open the MSI installer to launch the MySQL Server 8.4 Setup Wizard. Click Next to proceed with the installation.
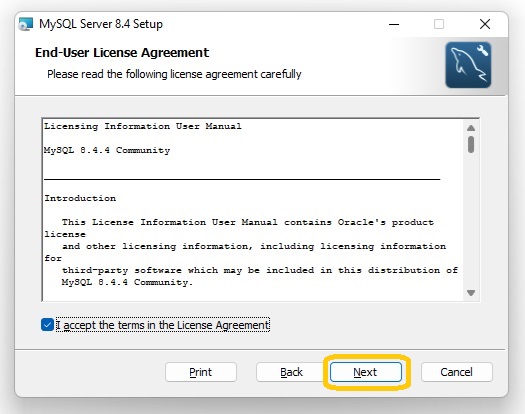
7. Next, the License Agreement window will appear. Check the box to accept the terms, then click Next to proceed.
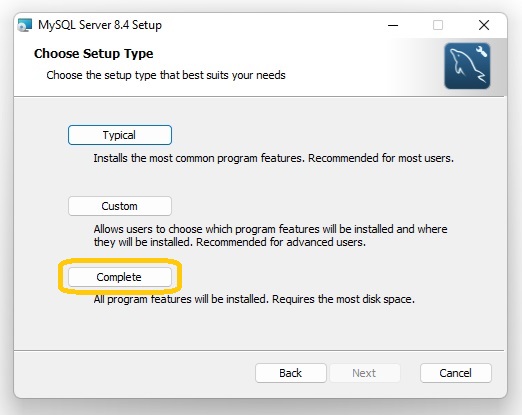
8. Next, choose the setup type that best fits your requirements. Select the Complete option to install all program features for a full MySQL setup.
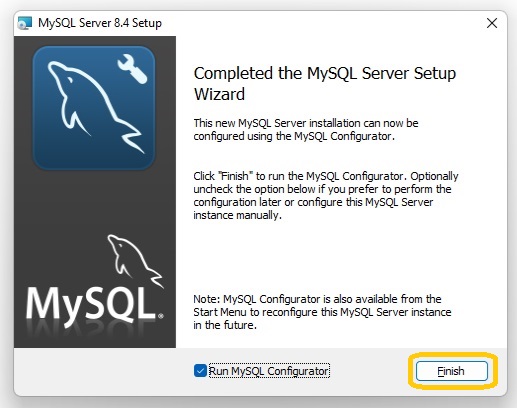
9. Once the setup is complete, click Finish to launch the MySQL Configurator.
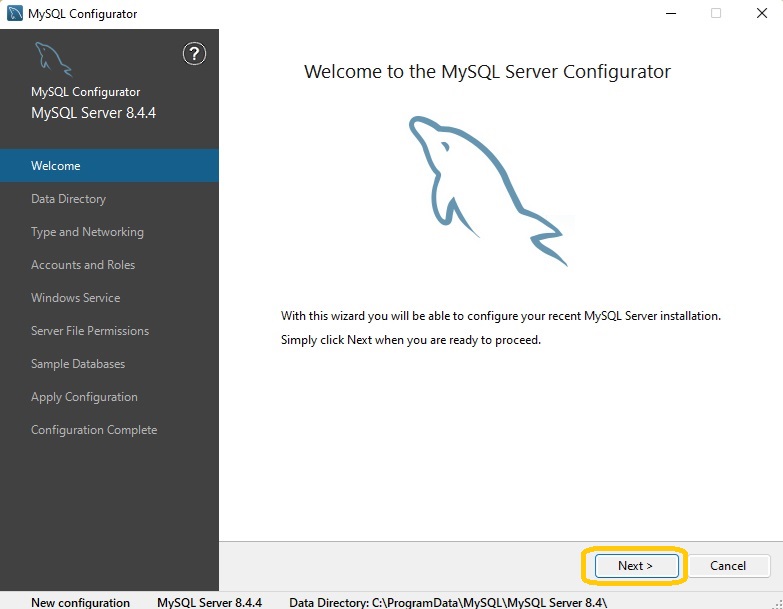
10. Next, the MySQL Server 8.4 Configurator wizard will appear to guide you through the setup process. Click Next to continue.
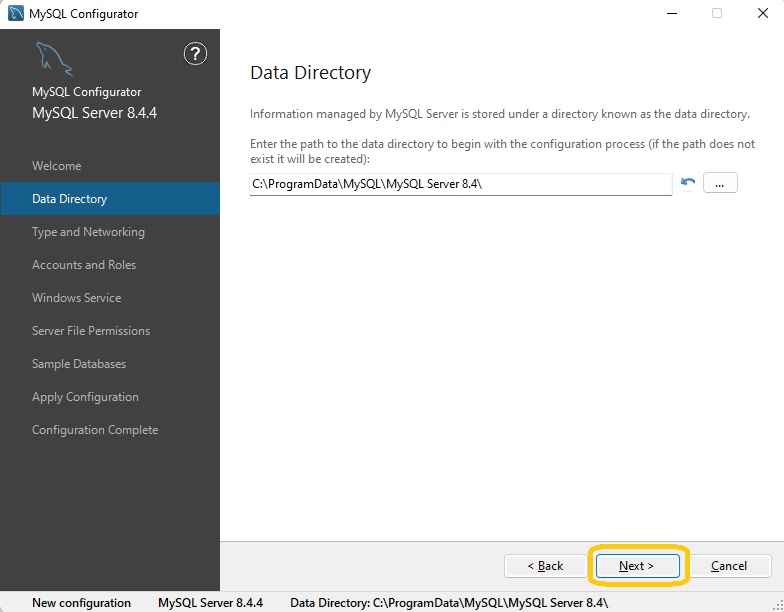
11. Next, the installer will display the path to the Data Directory, where MySQL will store its data files, to begin the configuration process.
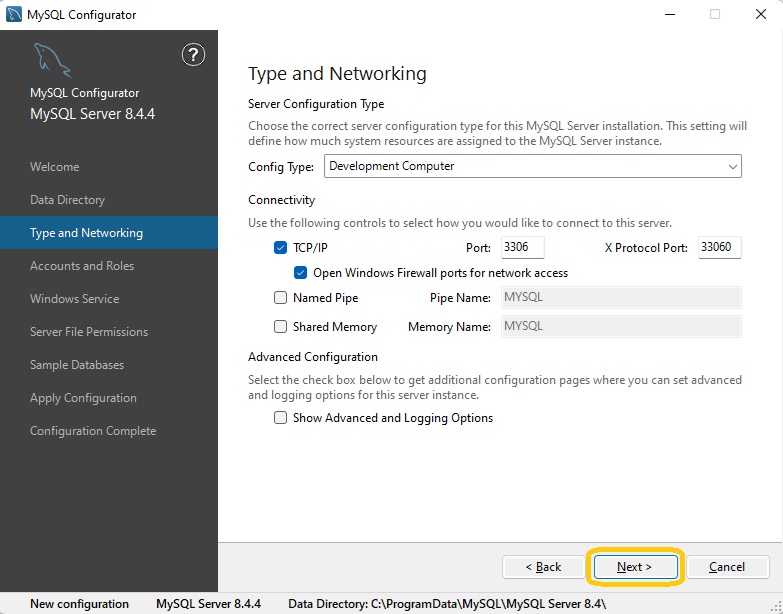
12. The configuration type and connectivity options for server connection will be displayed. Review the settings, then click Next to proceed.
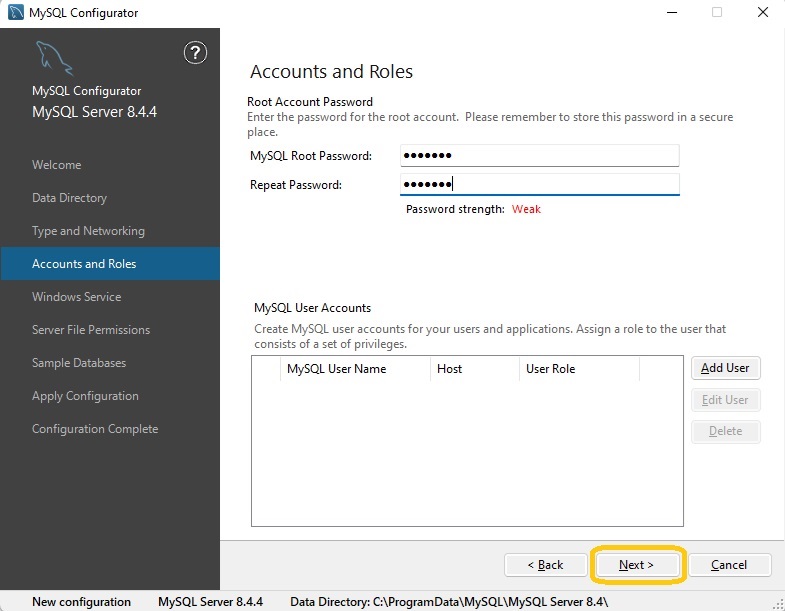
13. Create a secure password for the root account to protect database access, then click Next to continue with the setup.
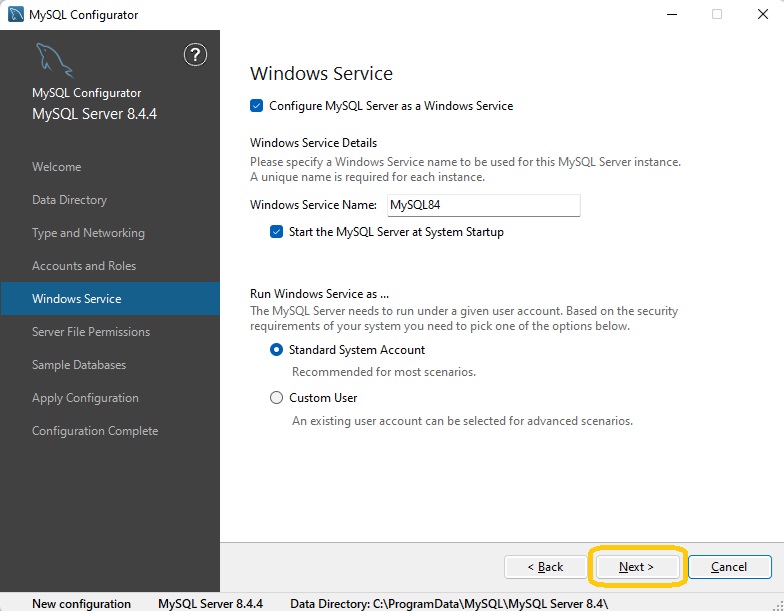
14. Now, the setup will display the Window Service details, including the service name for the MySQL server instance and the user account that will run the service.
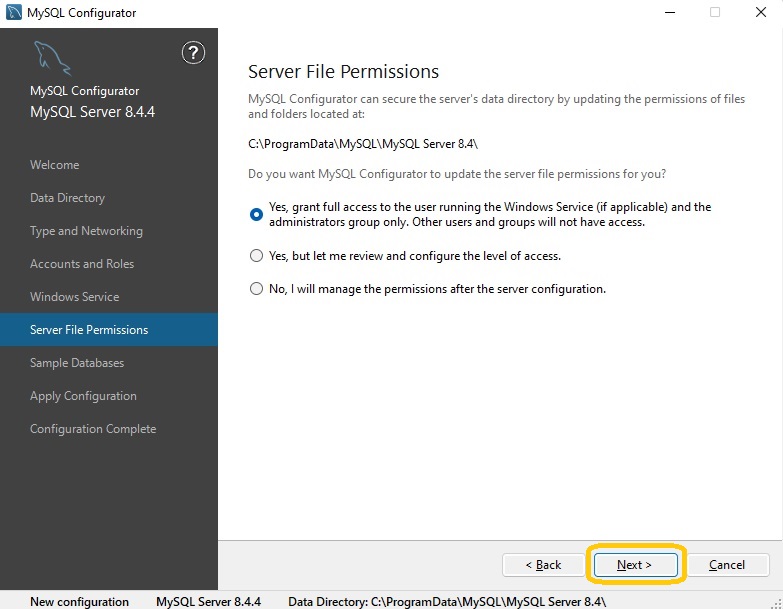
15. Next, the installer will display the Server File Permissions required to run the MySQL service on Windows. Select Grant full access to ensure proper functionality, then click Next to proceed.
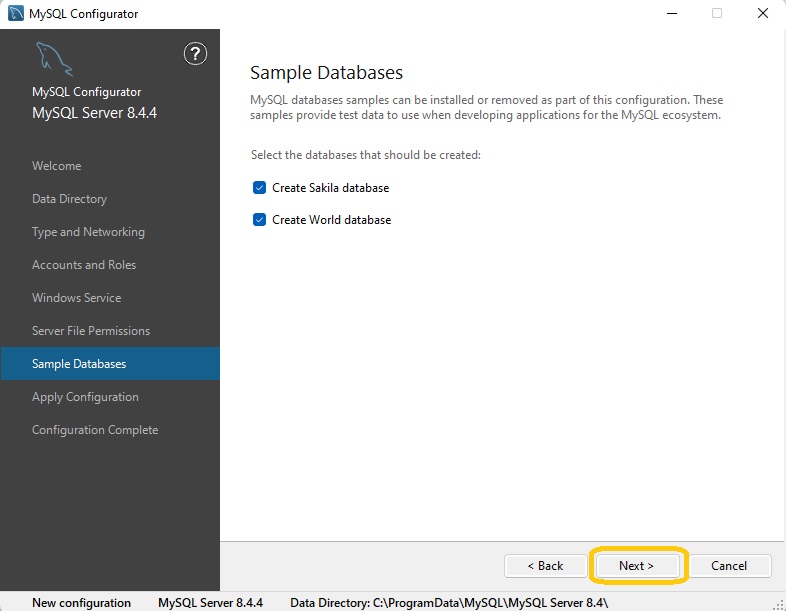
16. It provides Sample Databases for testing within the MySQL ecosystem. Select the databases and click Next to proceed.
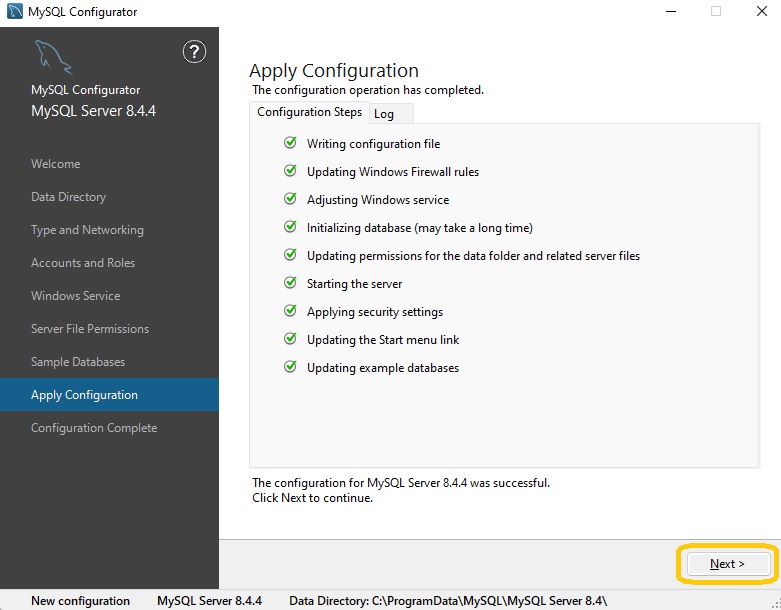
17. Next, the installer will provide you the configuration steps. Click the execute button to apply the settings. Once the process is complete, a confirmation message will appear indicating the successful configuration of MySQL Server 8.4. Click Next to proceed.
18. Finally, the configuration procedure wizard will confirm completion. Click the Finish button to complete the setup.

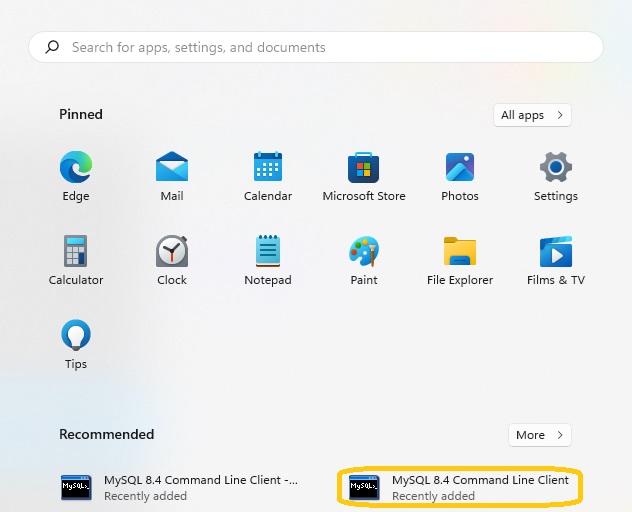
19. MySQL 8.4 has been successfully installed on Windows 11. To start using it, click Start and select MySQL Command Line Client option.
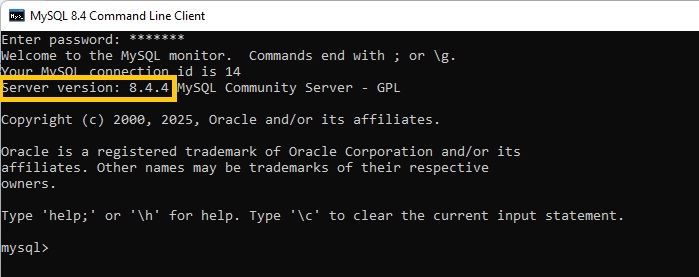
20. Enter the password when prompted in the command line, and the MySQL version will be displayed.
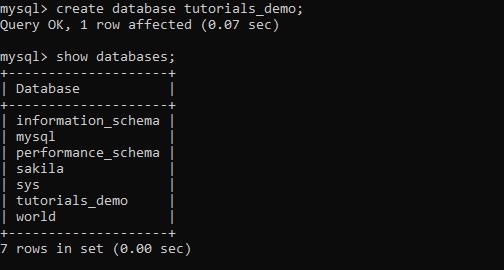
21. Now, you can verify the installation by creating a database using the command shown in the image.
Conclusion
You can easily install MySQL 8.4 on Windows 11 using the MySQL Installer. You can set up a completely working MySQL environment for development or production use using the above steps. To ensure the best performance and security, update and secure your installation regularly.
Also, check out how to connect MySQL database with PHP tutorial.
