This post explains all the steps required to create, build, and deploy the Hello World application using Ionic 4 on both Windows 10 and Ubuntu 18.04 LTS. The steps should be the same for other versions of Ionic, Windows
It assumes that the latest version of Node.js and
Install Ionic CLI
Ionic provides Command Line Interface(CLI) utility offering the wide range of dev tools and
// Install Ionic CLI globally using -g option
npm install -g ionic
Create App
Ionic provides several pre-made app templates. The most popular starter apps are blank and tabs. We will start with the blank app template, as shown below.
// Install app using blank template
ionic start hello blank
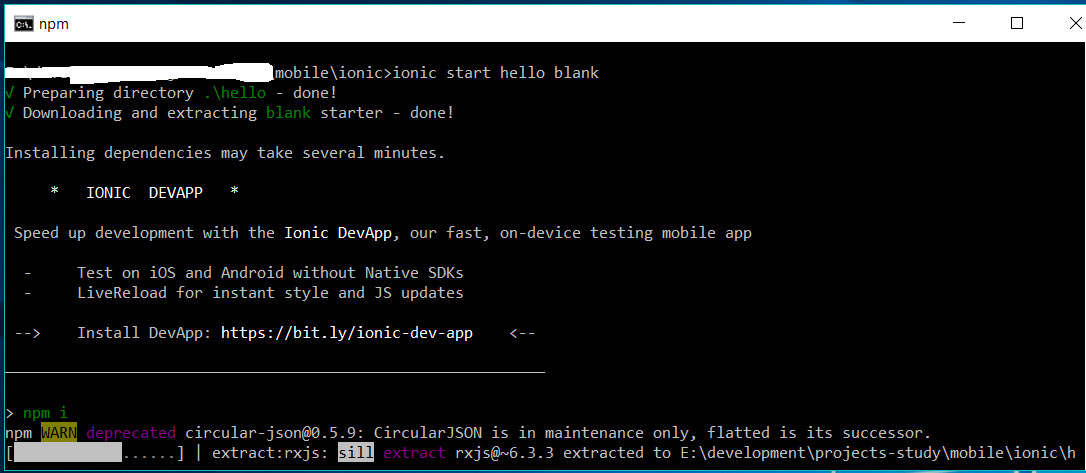
The app progress while installation will look similar to the one shown in Fig 1.

Fig 1
It will take some time to install all the dependencies. In the end, it asks to connect the App with the Ionic
Run the App
In this step, we will execute the app created in the previous step using the commands as shown below.
// Execute the hello app
cd hello
ionic serve
The above command will start a local server on localhost on port 8100 and open the app using the default browser - http://localhost:8100.
It might show security warning as shown in Fig 2. Select private networks and discard public networks.

Fig 2
The console should look like the one shown in Fig 3 after a successful build of the app.

Fig 3
The app in the browser should look like the one shown in Fig 4.

Fig 4
Resolve Issues
You might see the error Cannot GET / in the browser in case Python and Windows Build Tools for Node.js are not installed. Follow below-listed steps in such case to install the missing tools.
// Close the Command Line Tools of Windows and re-start it with Administrator privileges
// Optional commands in case ionic serve does not work out of box and browser shows the error
Cannot GET /

// Press Ctrl + C to stop the hello app
// Install windows build tools
npm install --global windows-build-tools

// remove node_modules directory from hello app and run npm install to re-install all dependencies
npm install
The above commands will install Python and Visual Studio Build Tools. Once the installation completes, remove and re-install node dependencies.
Hello Ionic
In this step, we will modify the home screen and write our greeting message. The server on console must be kept running. It will detect the change done by us and re-build and deploy the app where required. Accordingly, the browser will be refreshed.
Open the file hello/src/app/home/home.page.html and update the content as shown below.
<ion-header>
  <ion-toolbar>
    <ion-title>
      Hello Ionic
    </ion-title>
  </ion-toolbar>
</ion-header>
<ion-content padding>
  It's so easy !!
</ion-content>
The output on the browser looks like the one shown in Fig 5.

Fig 5
These are the basic steps to creating and executing the first app using Ionic.

