This tutorial provides all the steps required to install the Oracle Java 14 officially distributed by Oracle for Windows. It provides the steps required to install Java 14 on Windows 10. The steps should be the same for other versions of the Windows operating system.
Notes: The official installer provided by Oracle does not include the bundled JRE with JDK since Java 11. It can be installed separately if required. We can use Java 14 free for general-purpose computing usage. You can also, follow How To Install OpenJDK 14 On Windows to install the open-source version of Java 14 i.e. OpenJDK 14. Java 14 is using the Commercial License and OpenJDK 14 is using the open-source GNU General Public License v2, with the Classpath Exception (GPLv2+CPE).
You may also be interested in installing the LTS version of Java - How To Install Java 11 On Windows and How To Install Java 11 On Ubuntu.
You may also install the popular IDEs to develop Java applications by following - How To Install Eclipse For Java On Windows, How To Install IntelliJ IDEA for Java on Windows, How To Install NetBeans On Windows, and How To Install VSCode For Java On Windows. You may also follow the How To Install OpenJDK 14 On Ubuntu to install the latest OpenJDK on Ubuntu and How To Install Java 14 On Ubuntu to install Oracle JDK.
Step 1: Download JDK
Open the browser and search for Download JDK 14 or click the link to download from the Oracle website. It will show the JDK download page as shown in Fig 1.

Fig 1
Accept the License Agreement and click on the link to download the installer as highlighted in Fig 2. It will start downloading JDK 14 installer for Windows.

Fig 2
Step 2: Install JDK
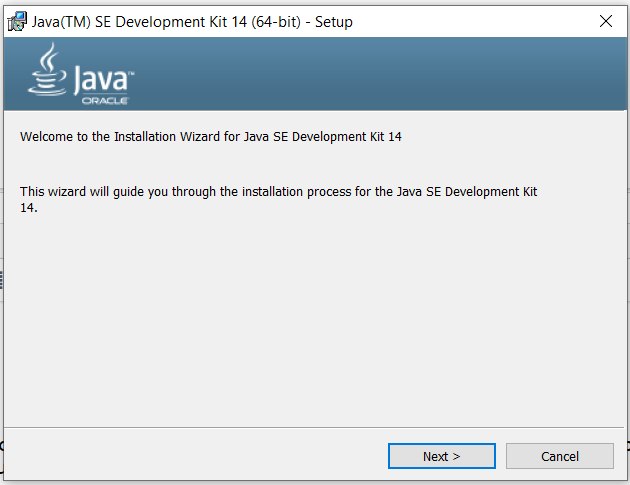
Now execute the JDK installer by double-clicking it. It might ask system permission before starting the installation. Click on yes to allow the installer to execute itself. It shows the installer welcome screen as displayed in Fig 3.

Fig 3
Click on Next Button to initiate the installation process. The next screen shows options to change the installation path. We can change the installation location on this screen if required as displayed in Fig 4.

Fig 4
Now click on Next Button to start the installation. It will show the progress as displayed in Fig 5.

Fig 5
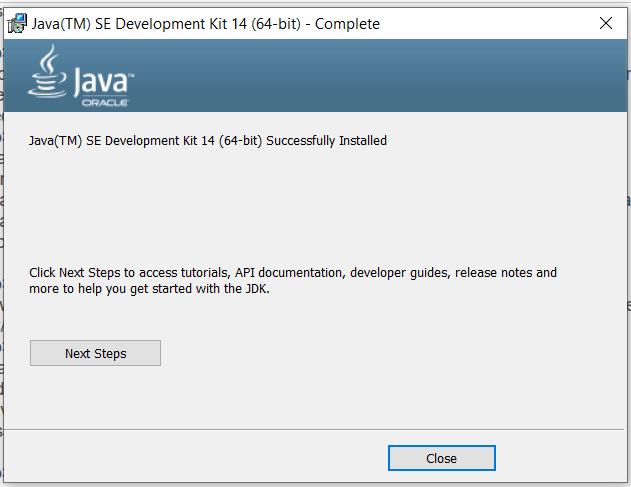
It shows the success screen after completing the installation as mentioned in Fig 6.

Fig 6
Now open the Command Prompt and type the command java -version to confirm whether it's installed successfully as mentioned in Fig 7.

Fig 7
It will either show the message - java is not recognized as an internal or external command or show the previously installed version. In order to start using the JDK installed by us from the command prompt, we need to set the environment variable. You can follow the below-mentioned steps to do so.
Right Click -> My Computer(This PC) -> Properties -> Advanced System Settings
The above steps will open the Windows settings panel as shown in Fig 8.

Fig 8
Now click on Environment Variables, select Path under System Variables section and click on Edit. We need to add the path of installed JDK to system Path.
Remove the path of previously installed JDK. Also, update JAVA_HOME in case it's already set. Now click on New Button and add the path to installed JDK bin which is C:\java\oracle\java-14\bin in my case as shown in Fig 9. Press OK Button 3 times to close all the windows. This sets the JDK 14 on system environment variables to access the same from the console.

Fig 9
Now again open the console and test the Java version as shown in Fig 10.

Fig 10
Getting started with Java - Hello World
In this step, we will write, compile, and execute our first program in Java using the standard Hello World example.
Now write the first Java program as shown below, save the program as HelloWorld.java and exit the editor. Make sure that the class name and file name are the same.
class HelloWorld {
	public static void main( String[] args ) {
		System.out.println( "Hello World !!\n" );
	}
}
Now open the command prompt and navigate to the path where you have saved your Java program. Use the below-mentioned commands to compile and execute the program.
# Compile - Specify file name and extension
javac HelloWorld.java

# Execute - Spicy file name
java HelloWorld

# Output
Hello World !!
These are the easy to install steps required to install Oracle Java on Windows and write, compile and execute the Java program.

