This tutorial provides all the steps required to format the USB Flash Drive on the Mac systems including macOS Sierra, Mojave, Catalina, etc using the Disk Utility which ships with the macOS. Make sure that you have backed up the existing files on the USB Flash Drive since the steps mentioned in this tutorial will erase the drive.
Step 1
Connect the Flash Drive to the Mac system. It will mount the drive and shows it on the Desktop.
Step 2
Open the Finder Application and click the Applications Option on the left panel. Also, click the Utilities Option on the right panel. It will show all the installed utilities as shown in Fig 1.

Fig 1
I have highlighted both the Disk Utility and the USB Drive to be formatted in Fig 1.
Step 3
Launch the Disk Utility application. I have selected the USB Flash Drive to be formatted as shown in Fig 2.

Fig 2
Step 4
Click the Erase Button as highlighted in Fig 3. It will open the Erase Disk Panel as shown in Fig 3.

Fig 3
Step 5
Click the Format Option to choose the file system on the disk as highlighted in Fig 4.

Fig 4
I have selected the MAC OS Extended (Journaled) file system. You can choose the file system based on your requirements.
Step 6
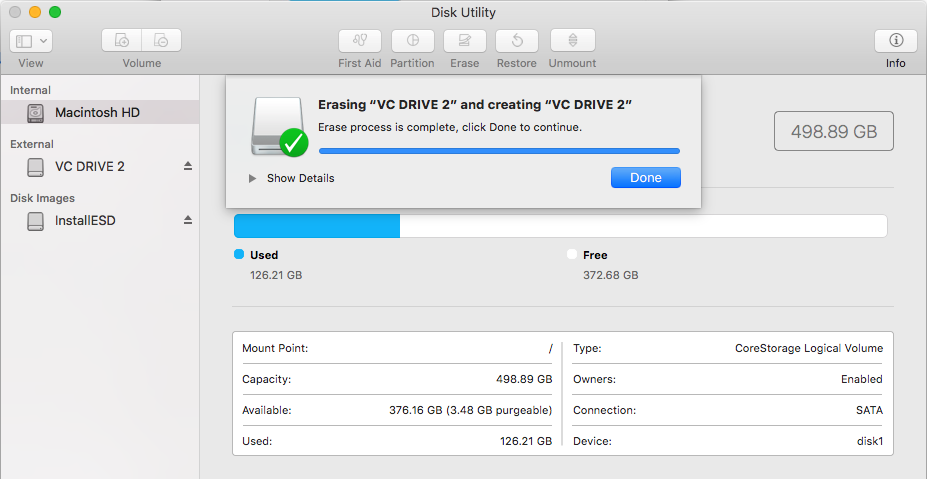
Click the Erase Button to format the drive. It will show the status as shown in Fig 5.

Fig 5
Step 7
Click the Done Button to close the Erase Panel. It will show the formatted drive with the File System selected by us as shown in Fig 6.

Fig 6
Summary
This tutorial provided all the steps required to format a USB Flash Drive using the Disk Utility shipped with the macOS. You may also join the discussion by submitting your comments.

