This tutorial provides all the steps required to install MySQL 8 on Ubuntu 18.04 LTS. The same steps could be followed for other versions of Ubuntu.
Notes: In order to follow this post, you must completely remove the previous installation of MySQL server installed using the installer if it's already installed on the system. You can follow How To Completely Remove MySQL From Ubuntu to completely remove the previous installation done using the installer.
You may also be interested in other MySQL specific tutorials including How To Install MySQL 8 on
Step 1: Download MySQL APT Repository
Since MySQL 8 is not included in the official repositories of Ubuntu 18.04, we have to download its Debian package. The current officially available version of MySQL on Ubuntu 18.04 is 5.7.26. Use the below-mentioned command to download the most recent APT repository.
# Download MySQL APT Repository
wget –c https://dev.mysql.com/get/mysql-apt-config_0.8.13-1_all.deb
It will download the official Debian package to install MySQL 8.
Step 2: Install MySQL Repository
Use the below-mentioned command to start installing the MySQL repository using the repository downloaded by us in the previous step.
sudo dpkg -i mysql-apt-config_0.8.13-1_all.deb
It will ask to choose from the available options as shown in Fig 1. Keep the default option selected and press the Enter key to start the installation.

Fig 1
On the next screen, the installer will ask to choose the MySQL version to be installed as shown in Fig 2. Keep mysql-8 selected and press Enter key.

Fig 2
It will show the first screen with the selected version of MySQL. Now press the down arrow key and next arrow key to move to the OK options as shown in Fig 3.

Fig 3
Press Enter key to start the installation. It will show below-mentioned messages after completing the installation.
bravo@pc1:/setups/database$ sudo dpkg -i mysql-apt-config_0.8.13-1_all.deb

Selecting previously unselected package mysql-apt-config.

(Reading database ... 200223 files and directories currently installed.)

Preparing to unpack mysql-apt-config_0.8.13-1_all.deb ...

Unpacking mysql-apt-config (0.8.13-1) ...

Setting up mysql-apt-config (0.8.13-1) ...

Warning: apt-key should not be used in scripts (called from postinst maintainerscript of the package mysql-apt-config)
Step 3: Refresh System Repositories
Now refresh the system repositories using the command as mentioned below.
sudo apt-get update
# It must show MySQL 8 repos
bravo@pc1:/setups/database$ sudo apt-get update

Hit:1 http://repo.mysql.com/apt/ubuntu bionic InRelease
Hit:2 http://in.archive.ubuntu.com/ubuntu bionic InRelease
Hit:3 http://in.archive.ubuntu.com/ubuntu bionic-updates InRelease
Hit:4 http://in.archive.ubuntu.com/ubuntu bionic-backports InRelease
Hit:5 http://security.ubuntu.com/ubuntu bionic-security InRelease
Get:6 http://repo.mysql.com/apt/ubuntu bionic/mysql-8.0 Sources [962 B]
Get:7 http://repo.mysql.com/apt/ubuntu bionic/mysql-8.0 i386 Packages [7,472 B]
Get:8 http://repo.mysql.com/apt/ubuntu bionic/mysql-8.0 amd64 Packages [7,463 B]

Fetched 15.9 kB in 3s (5,556 B/s)
Reading package lists... Done
It will refresh the system cache to get updates about the most recent versions of the available packages.
Step 4: Install MySQL Server
After updating the system cache, we can start installing the MySQL server and client using the command as mentioned below.
# Install MySQL Server 8
sudo apt-get install mysql-server mysql-client
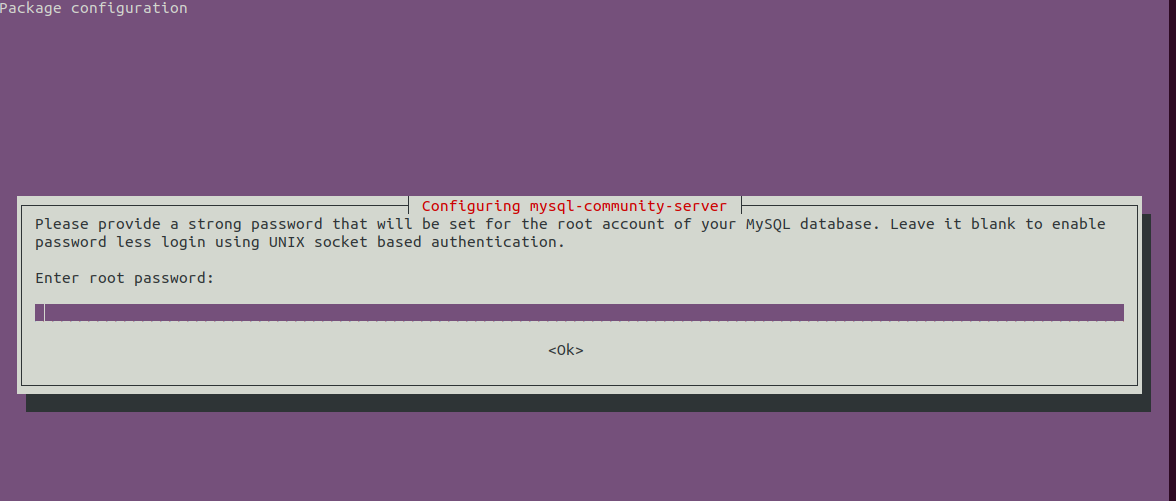
Press Y to confirm and continue with the installation. With this, MySQL gets installed as we do with the default package available on Ubuntu repositories. The installation will also ask to choose

Fig 4

Fig 5

Fig 6
Step 5: Secure MySQL Installation
We must also secure the installation using the command as mentioned below.
sudo mysql_secure_installation
It will ask to set the root password and a few security questions. The complete steps followed by me are as shown below.
bravo@pc1:/setups/database$ sudo mysql_secure_installation

Securing the MySQL server deployment.

Enter password for user root:

VALIDATE PASSWORD COMPONENT can be used to test passwords
and improve security. It checks the strength of password
and allows the users to set only those passwords which are
secure enough. Would you like to setup VALIDATE PASSWORD component?
Press y|Y for Yes, any other key for No: y

There are three levels of password validation policy:
LOW    Length >= 8
MEDIUM Length >= 8, numeric, mixed case, and special characters
STRONG Length >= 8, numeric, mixed case, special characters and dictionary                  file


Please enter 0 = LOW, 1 = MEDIUM and 2 = STRONG: 1
Using existing password for root.
Estimated strength of the password: 25

Change the password for root ? ((Press y|Y for Yes, any other key for No) : n

 ... skipping.

By default, a MySQL installation has an anonymous user,
allowing anyone to log into MySQL without having to have
a user account created for them. This is intended only for
testing, and to make the installation go a bit smoother.

You should remove them before moving into a production
environment.

Remove anonymous users? (Press y|Y for Yes, any other key for No) : y
Success.

Normally, root should only be allowed to connect from
'localhost'. This ensures that someone cannot guess at
the root password from the network.

Disallow root login remotely? (Press y|Y for Yes, any other key for No) : y
Success.

By default, MySQL comes with a database named 'test' that
anyone can access. This is also intended only for testing,
and should be removed before moving into a production
environment.

Remove test database and access to it? (Press y|Y for Yes, any other key for No) : y
 - Dropping test database...
Success.
 - Removing privileges on test database...
Success.

Reloading the privilege tables will ensure that all changes
made so far will take effect immediately.

Reload privilege tables now? (Press y|Y for Yes, any other key for No) : y
Success.

All done!

bravo@pc1:/setups/database$
The above steps remove the test database and anonymous users. It also disallows remote login to ensure that the server is accessible locally either using 127.0.0.1 or localhost.
Use the below-mentioned command to check whether MySQL server is running.
bravo@pc1:/setups/database$ systemctl status mysql

● mysql.service - MySQL Community Server

   Loaded: loaded (/lib/systemd/system/mysql.service; enabled; vendor preset: enabled)

   Active: active (running) since Thu 2019-08-15 10:40:47 IST; 4min 45s ago

     Docs: man:mysqld(8)

           http://dev.mysql.com/doc/refman/en/using-systemd.html

  Process: 28669 ExecStartPre=/usr/share/mysql-8.0/mysql-systemd-start pre (code=exited, status=0/SUCCESS)

 Main PID: 28708 (mysqld)

   Status: "Server is operational"

    Tasks: 38 (limit: 4915)

   CGroup: /system.slice/mysql.service

           └─28708 /usr/sbin/mysqld

Aug 15 10:40:45 bravo systemd[1]: Starting MySQL Community Server...

Aug 15 10:40:47 bravo systemd[1]: Started MySQL Community Server.
Step 6: Check the version and access
Check the version of the server we installed and make sure that it is accessible using the root password we configured.
# Check version
sudo mysql --version
mysql  Ver 8.0.17 for Linux on x86_64 (MySQL Community Server - GPL)

# Login
sudo mysql -u root -p
Step 7: Important Commands
This section shows some essential commands to start, stop, and restart the server.
# Check server status
sudo service mysql status

# Stop server
sudo service mysql stop

# Start server
sudo service mysql start

# Restart server
sudo service mysql restart
Step 8: Using Password Plugins
In case you have opted to use password plugin option for backword campatibility with version 5.7, it might be required to connect to the MySQL Server using the account with
# Login to MySQL
# Check password plugin of root user

SELECT user,authentication_string,plugin,host FROM mysql.user;
# Note the password plugin of root user

+------------------+-------------------------------------------+-----------------------+-----------+

| user             | authentication_string                     | plugin                | host      |

+------------------+-------------------------------------------+-----------------------+-----------+

| root             |                                           | auth_socket           | localhost |

+------------------+-------------------------------------------+-----------------------+-----------+


# Change password plugin of root user to native
ALTER USER 'root'@'localhost' IDENTIFIED WITH mysql_native_password BY '<pw>';

# Apply changes
flush privileges;

# Check password scheme of user
SELECT user,authentication_string,plugin,host FROM mysql.user;

# Note the password plugin of root user
+------------------+-------------------------------------------+-----------------------+-----------+

| user             | authentication_string                     | plugin                | host      |

+------------------+-------------------------------------------+-----------------------+-----------+

| root             | *E5C4F73D963132CEF9BB4PA79LA818C08BAQC300 | mysql_native_password | localhost |

+------------------+-------------------------------------------+-----------------------+-----------+

# Change to new and recommended password plugin
ALTER USER 'root'@'localhost' IDENTIFIED WITH caching_sha2_password BY '<pw>';

# Apply changes
flush privileges;

# Check password scheme of user
SELECT user,authentication_string,plugin,host FROM mysql.user;
+------------------+------------------------------------------------------------------------+-----------------------+-----------+

| user             | authentication_string                                                  | plugin                | host      |

+------------------+------------------------------------------------------------------------+-----------------------+-----------+

| root             | $A$005$THISISACOMBINATIONOFINVALIDSALTANDPASSWORDTHATMUSTNEVERBRBEUSED | caching_sha2_password | localhost |

+------------------+------------------------------------------------------------------------+-----------------------+-----------+
This is how we can install the most recent version of MySQL server i.e MySQL 8 on Ubuntu 18.04 LTS.

