Dependency Management is one of the important aspects of programming software using re-usable packages, libraries, and modules. Almost all the popular programming languages are supported by dependency management tools to manage project dependencies. We can manage the project dependencies in PHP using Composer.
This tutorial provides all the steps required to install Composer on Windows 10. The steps should be similar on other versions of Windows. It assumes that PHP is already installed on the system. You can also follow How To Install PHP 7 On Windows.
Download Composer
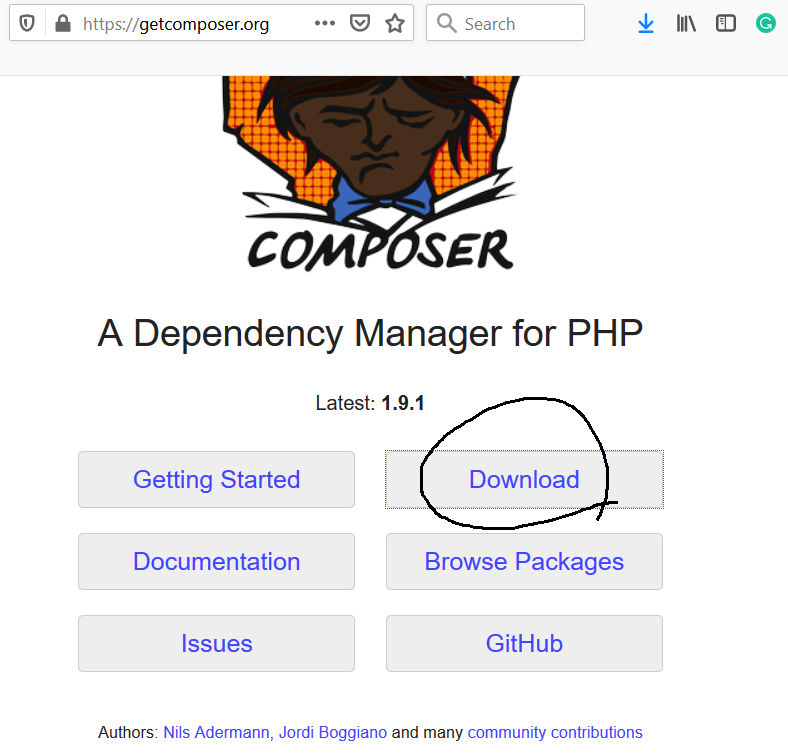
Open the official website of Composer to download the most recent version. It provides options to download Composer as shown in Fig 1.

Fig 1
Click on the Download Button to view download options. It will show the options to download or install Composer as shown in Fig 2.

Fig 2
Click on the executable setup link as highlighted in Fig 2. It will start downloading the Composer.
Install Composer
Now execute the installer downloaded in the previous step to start installing it. It will ask to choose the installation mode as shown in Fig 3.

Fig 3
You may install it locally for your account, though it's recommended to install it globally for all the users. Choose your option. I have selected the first option to install it globally. It will ask for system permission. Grant the system permissions to continue with the installation. It shows installation options as shown in Fig 4.

Fig 4
Keep the Developer Mode unchecked and click the Next Button to continue with the installation. The next screen provides options to choose the PHP executable as shown in Fig 5.

Fig 5
You may change or choose the PHP path if required. After confirming the PHP executable, click the Next Button to continue with the installation. It will ask for proxy settings as shown in Fig 6.

Fig 6
We can simply skip it by keeping the checkbox unchecked and click the Next Button. The next screen shows the options selected by us as shown in Fig 7.

Fig 7
Click the Install Button to start the installation. It will show the installation progress as shown in Fig 8.

Fig 8
It might also show OneDrive issue as shown in Fig 9.

Fig 9
Click the Next Button to continue the installation. It shows the success screen after completing the installation as shown in Fig 10.

Fig 10
This is how we can install the most recent version of Composer on Windows.
Verify Installation
We can verify the installation by checking the version on the command line as shown in Fig 11.

Fig 11
Using Composer
In this step, we will learn using the composer in our projects. The composer specific configuration for each project can be managed using the composer.json file placed at the root of the project. We can either generate this file manually or it will be generated for the first dependency added by us.
I have added the PHPMailer as the first dependency to my project using the command as shown below.
# Install PHPMailer as project dependency
composer require phpmailer/phpmailer

# Output
Using version ^6.1 for phpmailer/phpmailer
./composer.json has been created
Loading composer repositories with package information
Updating dependencies (including require-dev)
Package operations: 1 install, 0 updates, 0 removals
  - Installing phpmailer/phpmailer (v6.1.4): Downloading (100%)
phpmailer/phpmailer suggests installing psr/log (For optional PSR-3 debug logging)
phpmailer/phpmailer suggests installing league/oauth2-google (Needed for Google XOAUTH2 authentication)
phpmailer/phpmailer suggests installing hayageek/oauth2-yahoo (Needed for Yahoo XOAUTH2 authentication)
phpmailer/phpmailer suggests installing stevenmaguire/oauth2-microsoft (Needed for Microsoft XOAUTH2 authentication)
phpmailer/phpmailer suggests installing symfony/polyfill-mbstring (To support UTF-8 if the Mbstring PHP extension is not enabled (^1.2))
Writing lock file
Generating autoload files
It generates the composer.json, composer.lock files at the project root directory. It also creates the vendor directory having the PHPMailer as the dependency. It also creates the autoload.php file within the vendor directory.
The composer.json file content is shown below.
{
    "require": {
        "phpmailer/phpmailer": "^6.1"
    }
}
We can also manually update this file to add further dependencies or simply run the command composer require to add the required dependencies. In case we update this file manually, we must run the command composer update to apply the changes.
We must add the autoload.php file within the project's PHP files to use the dependencies. It can be done as shown below:
<?php
require __DIR__ . '/vendor/autoload.php';
use PHPMailer\PHPMailer\PHPMailer;
....
....
....
$mailer = new PHPMailer( true );
....
....
The above lines include the PHPMailer dependency to the PHP file. We can create the PHPMailer object without including its file since the autoload.php file add it as a dependency.
Autoload Project Classes
We can also autoload the project classes by adding the classes in the src directory and configuring the project composer file as explained at - How To Autoload PHP Classes Using Composer.
Summary
We have successfully installed the most recent version of Composer on Windows 10 and also saw how to use it in our projects to manage the dependencies.

