Docker is a tool that can be used to set up different environments having its own set of applications in a container without installing the applications on the main system. This makes it easy to develop multiple projects on the same system without installing the project-specific applications on the system. Docker can be used to run applications in lightweight containers without interfering with the system configurations and software installed on the system.
This tutorial provides all the steps required to install Docker Desktop on macOS Catalina on Intel Chip. The steps should be the same on other versions of macOS including Big Sur.
Prerequisites
We can install Docker Desktop for macOS on Mojave, Catalina, or Big Sur. The system must have at least 4GB of RAM. Also, VirtualBox prior to version 4.3.30 must not be installed on the system.
Download Docker Desktop for macOS
In this step, we will download the Docker Desktop DMG for macOS from the official website as shown in Fig 1. It includes Docker Engine, Docker CLI Client, Docker Compose, Docker Content Trust, Kubernetes, and Credential Helper.

Fig 1
Click the Download Button as highlighted in Fig 1 to start downloading the Docker Desktop for macOS.
Install Docker Desktop on macOS
On completing the download, double-click the DMG file to start installing Docker Desktop on macOS. It will show the progress while opening the image as shown in Fig 2.

Fig 2
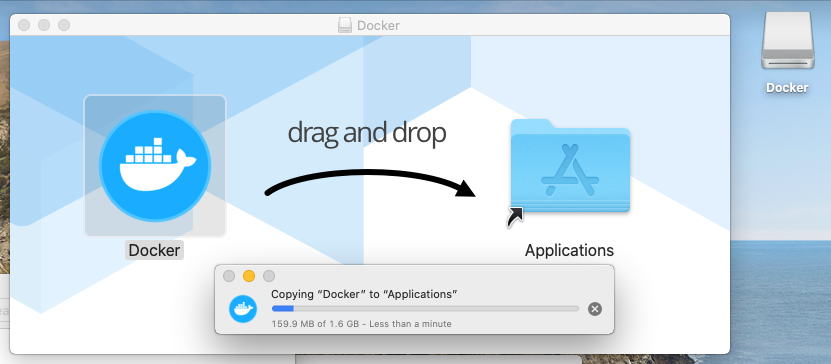
On successful mount, it will show the options to move the Docker to Applications as shown in Fig 3.

Fig 3.
Now Drag and Drop the Docker Icon to the Applications directory. It will show the installation progress as shown in
Fig 4.

Close the window and unmount the Docker Image by right-clicking the Image and click Eject Option.
Launch Docker Desktop on macOS
In this step, we will launch the Docker Desktop on macOS from the applications directory as shown in Fig 5. Now, go to your applications directory and double-click the Docker Icon to launch it.

Fig 5.
It will ask to launch Docker Desktop for the first time as shown in Fig 6.

Fig 6
Click the Open Button to launch Docker Desktop. It will also ask for privileges for the first time as shown in Fig 7.

Fig 7
Click the OK Button to grant privileges. It will ask for the password as shown in Fig 8.

Fig 8
Now enter the password and click Install Helper Button. It will ask to accept the License Agreement as shown in

Fig 9
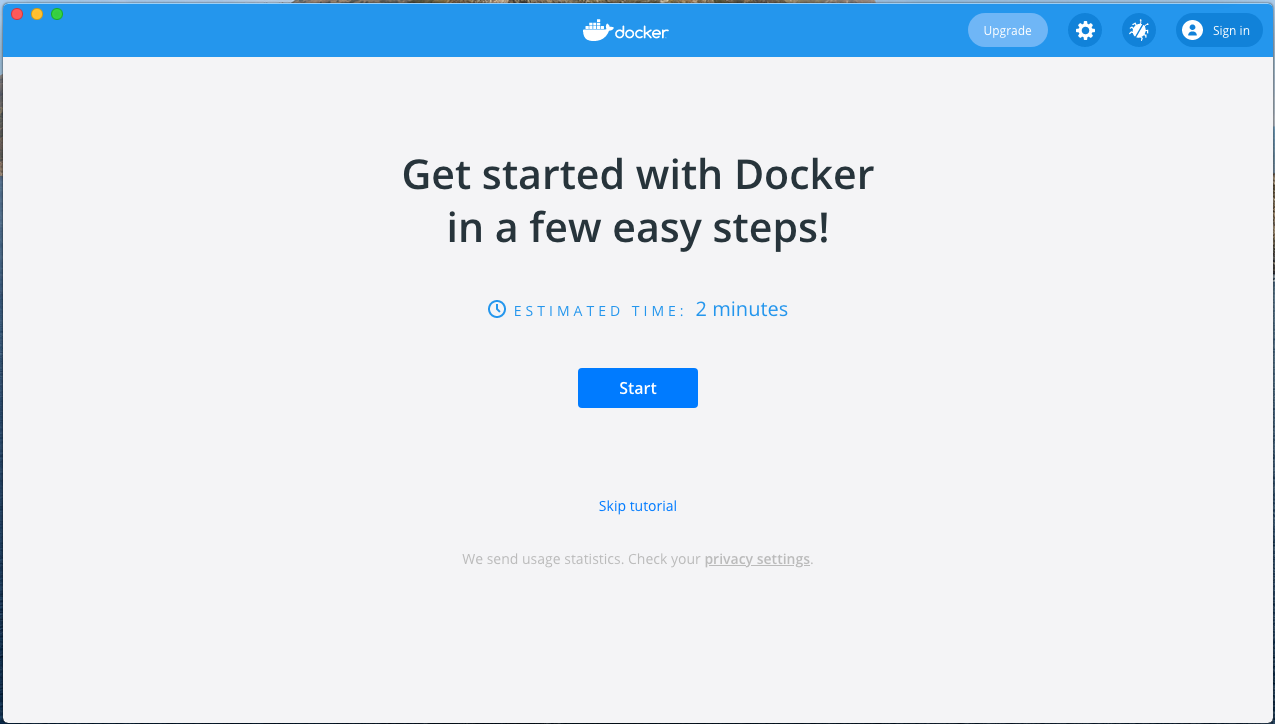
Accept the License Agreement as shown in Fig 9. It will start the Docker Engine and shows the options to follow Getting Started Tutorial as shown in Fig 10 and Fig 11.

Fig 10

Fig 11
You may skip the tutorial. In either way, it will show the Containers / App Screen as shown in Fig 12.

Fig 12
This completes the installation of the Docker Desktop on macOS.
Hello World
In this step, we will launch the getting started image. Now copy the command and open the terminal to install and run the image as shown in Fig 13.
# Run Getting Started Image
docker run -d -p 80:80 docker/getting-started

Fig 13
Now open the browser and enter localhost. It will show the output of the Getting Started Container as shown in

Fig 14
We can stop the Container as shown in Fig 15.

Fig 15
Change the Data Path
We might be required to change the path to store the images and containers on a drive different than the root drive. We can check the default storage path from Docker Desktop as shown in Fig 16.

Fig 16
Make a note of the directory structure of /Users/<username>/Library/Containers/com.docker.docker/Data/vms/0/data.
Now click the Browse Button to browse the new location as shown in Fig 17.

Fig 17
Also, click the Apply & Restart Button to update the Disk image location. In this way, we can avoid Docker using the Root Disk to store the images.
Summary
This tutorial provided all the steps required to install Docker Desktop for macOS using Catalina. It also provided the steps to run the first image i.e. Getting Started.

