We can use Workbench to connect to a remote MySQL server using the SSH key as shown above. This tutorial provides the steps to use Workbench to connect to a remote MySQL server over SSH tunnel using the SSH key.
Prerequisites
This tutorial assumes that the MySQL Client and MySQL Server are installed on the remote systems. It also assumes that the MySQL Workbench is installed on the local system.
Connect Directly
We can directly connect to the MySQL Server installed on the remote system. In this scenario, the MySQL Server and Client are installed on the same remote server.
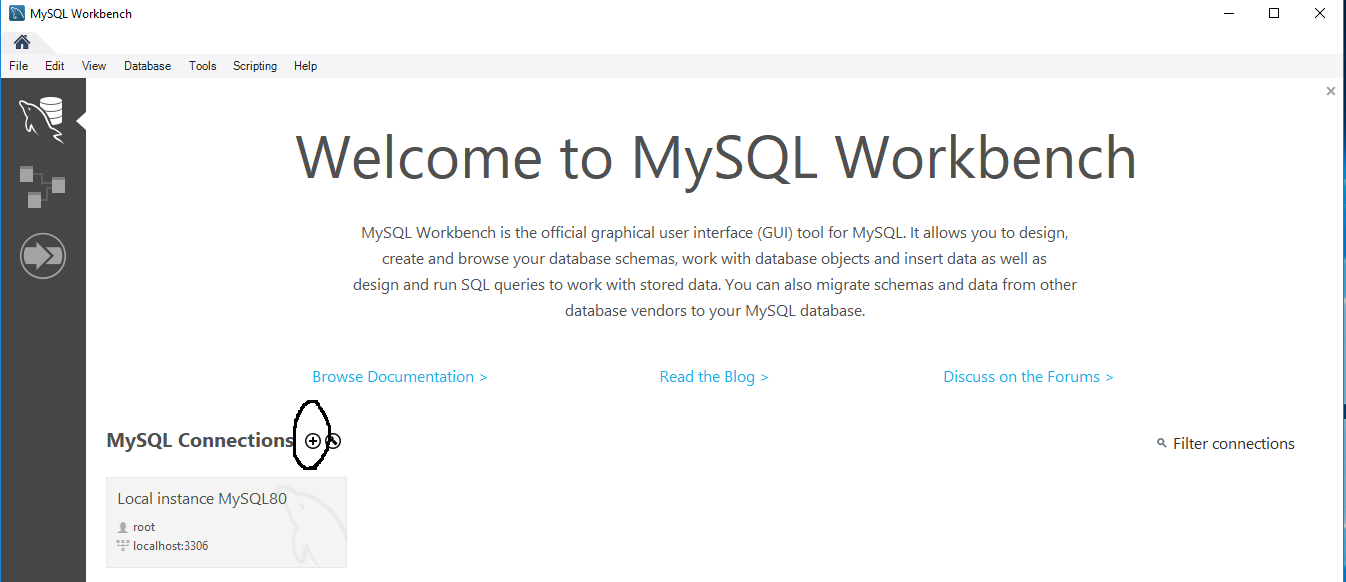
Now launch Workbench. It shows the Welcome Screen as shown in Fig 1.

Fig 1
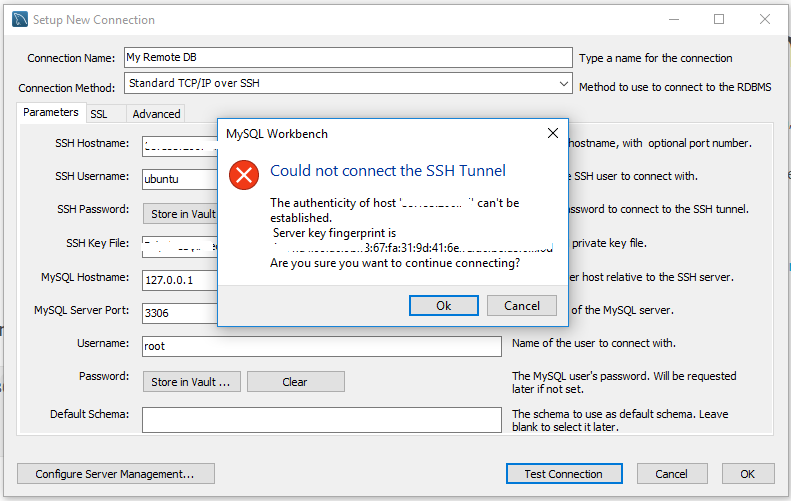
Click the Plus Icon as highlighted in Fig 1 to create a new connection. It shows the wizard to configure the connection as shown in Fig 2.

Fig 2
Fill the connection parameters as listed below.
- Connection Name - The connection name for your reference.
- Connection Method - Choose the connection method as Standard TCP/IP over SSH.
- SSH Hostname - Provide the remote system IP and Port. The port must be 22 unless it's configured directly on the remote system.
- SSH Username - The system username used to connect the remote server.
- SSH Password OR SSH Key File - The System User Password or SSH Key File used to connect the remote system over SSH.
- MySQL Hostname - Keep it 127.0.0.1 to access the MySQL server installed on the same remote system.
- MySQL Server Port - It must be 3306 unless your remote server is configured to use a different port.
- Username - The MySQL server username to open the connection.
- Password - The MySQL server user password. You can either store in Vault by clicking the Store in Vault Button.
Click the Test Connection Button after filling all the fields. It might show the SSH warning for the first time as shown in Fig 3.

Fig 3
Click the OK Button to confirm the connection. It will prompt for the password as shown in Fig 4 in case you have not stored it in the Vault.

Fig 4
Now provide the password and click the OK Button. It will show the success message on connection success as shown in Fig 5.

Fig 5
Now click the OK Button to close the dialog. Also, click OK Button once more to add the connection to connections library as shown in Fig 6.

Fig 6
Now click the newly added connection to connect to the MySQL Server. It will connect with remote MySQL Server over SSH Tunnel and shows the databases by clicking the Schemas Tab as shown in Fig 7.

Fig 7
Connect Via MySQL Client
We can connect to the MySQL Server using the MySQL Client installed on the remote system. In this scenario, the MySQL Server is installed on a different server than the connecting remote server. The remote server must have the MySQL Client and access to connect to the MySQL Server.
On AWS, we can connect to RDS instance having MySQL Server by using the MySQL Client installed on an EC2 instance. The local system will connect to the EC2 instance which further connects to the RDS instance.
The steps to connect to the remote system having MySQL Client remain the same except the connection parameter MySQL Hostname value. The MySQL Hostname must be set to the IP address or Hostname of the MySQL server. Also, make sure that the remote system having MySQL Client is permitted to connect to the MySQL Server.
Summary
This tutorial provided the steps required to connect to MySQL remote server over SSH Tunnel using Workbench.

