Sometimes, it might be required to remove a specific or single color from the images or documents in Photoshop. The steps provided in this tutorial assumes that the color to be removed is sharp and its variations are not there. We can remove the single color leaving all other colors without any changes. The images generated from the vector graphics with solid colors are more appropriate for this process. I have used the free image Warning Kangaroo Roadsign from Pixabay for demonstration purposes.
Download Image
Download and open the image in Photoshop. It should be similar to Fig 1.

Fig 1
Delete Single Color
Now click the Select Option on the Main Menu and click Color Range Option as shown in Fig 2.

Fig 2
Move the dropper over the image and click the color to be removed. I have clicked the Yellow Color. It will select the color in the entire image as shown in Fig 3.

Fig 3
Keep the Fuzziness value to zero. You can also choose the color from the Sampled Colors dropdown. Also, you can press Shift Key to add multiple colors to the selection. Now press the OK Button. It will show the color selection as shown in Fig 4.

Fig 4
We can press the Delete Button to delete the selected color from the image. It should show the remaining colors after deleting the selected color as shown in Fig 5.

Fig 5
Now press Ctrl + D to deselect the selection. Save the Image with the remaining colors. This is all about removing a specific or single color in Photoshop.
Change Single Color
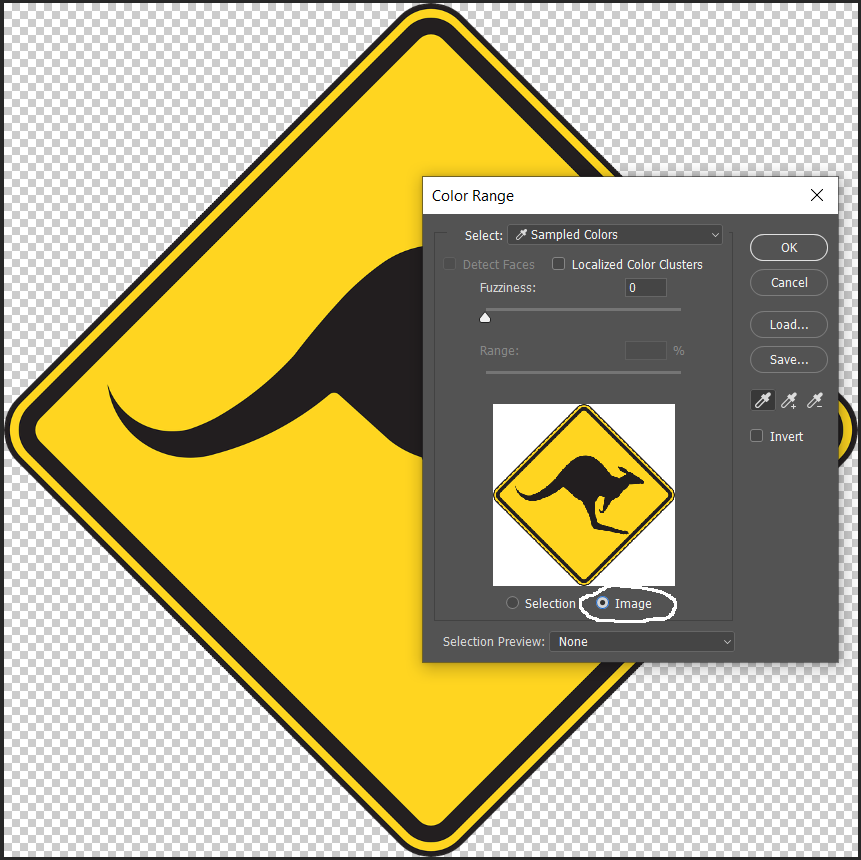
Again open the original image and click Select -> Color Range and pick the yellow color. Also, click the Image Option to view the selection with the Image as highlighted in Fig 6.

Fig 6
Now click the OK Button. It should show the selection as we saw in the previous section. Press the key M to activate the Marquee Tool. Also, right-click the selection and click Layer Via Cut Option as shown in Fig 7.

Fig 7
It will cut the selected color from the active layer and create a new layer having the selected color. Now press Ctrl + D to deselect the selection. It will show the new layer as highlighted in Fig 8.

Fig 8
Now select the new layer and double click it to view the layer options. Also, choose the Color Overlay Option and change the color as shown in Fig 9.

Fig 9
We can see that there are traces of the Yellow Colored border due to the change in color value at the edges. We can further refine our selection by selecting the color at the border using the Shift Key while selecting the color using Color Range.
Summary
This tutorial provided the steps required to either delete or change the selected color. We can either do it for single or multiple colors selected using the Color Range Panel.

