Python has emerged as one of the major programming languages used to develop different types of applications including Web Applications, Desktop Applications, Numeric and Scientific Applications, etc. It soon entered into mainstream programming and majorly popular in data science engineers. It's a high-level programming language used for general-purpose programming.
This tutorial provides all the steps required to install the most recent version of Python 3 i.e. Python 3.8 on Windows 10. The steps should be similar for other versions of Python and Windows.
Step 1: Download
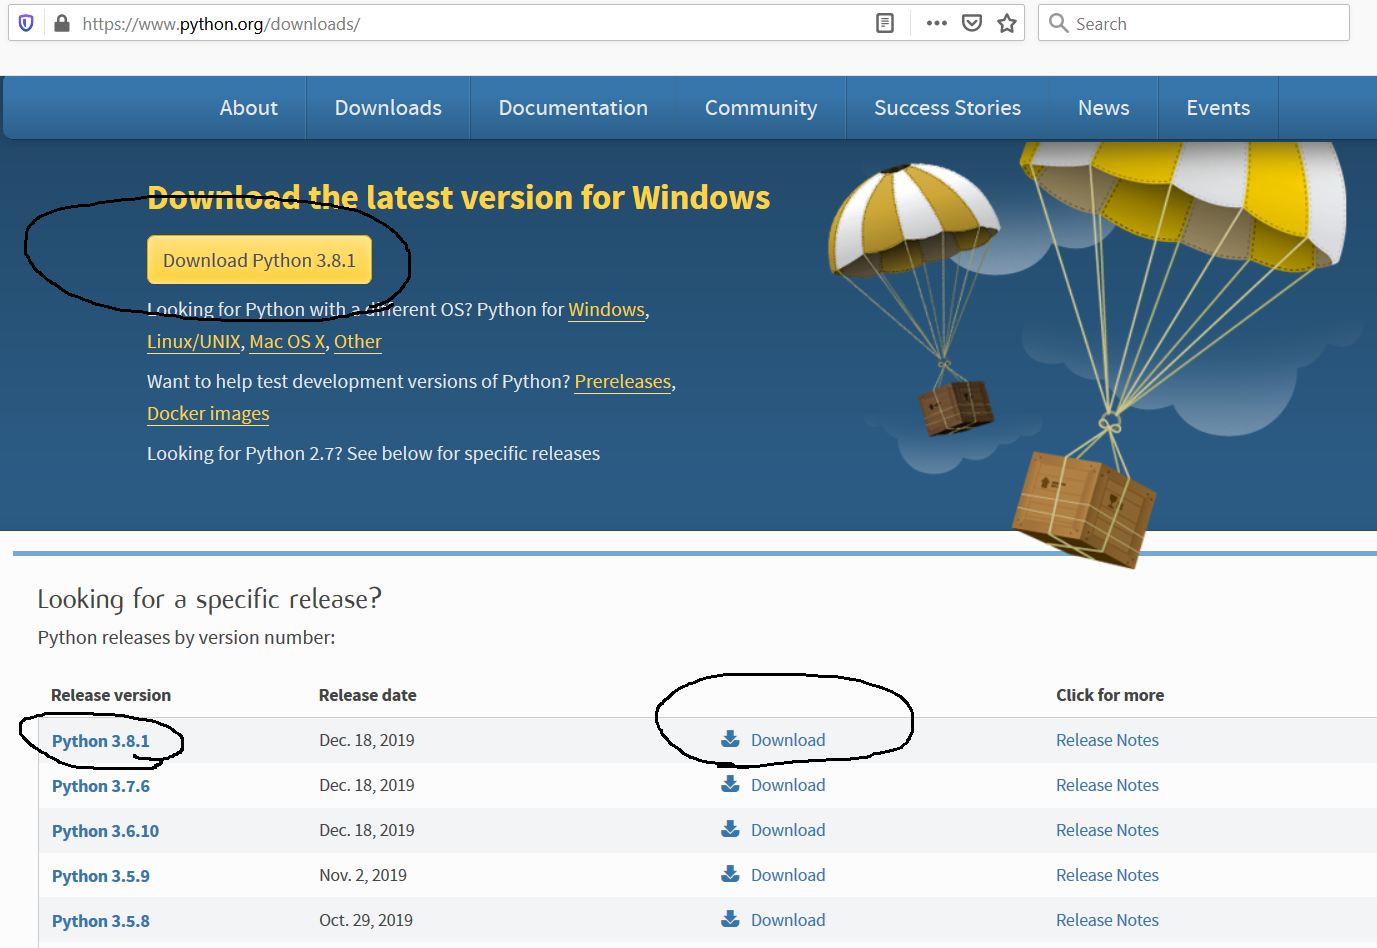
Open the Downloads Page for Windows and choose the most recent version as highlighted in Fig 1.

Fig 1
You can directly start downloading the most recent version by clicking the yellow button or choose the other download options from the downloads list as shown in Fig 1. I have clicked on the Download Link of Python 3.81 while writing this tutorial. It shows the download options for Python 3.8.1 for both 32-bit and 64-bit operating systems as shown in Fig 2.

Fig 2
I have downloaded the 64-bit version for my 64-bit Windows 10.
Step 2: Install
After completing the download, double click the installer to start the installation. The welcome screen shows the default installation location and provides options to Install the launcher for all users and to add Python 3.8 to the system path as shown in Fig 3.

Fig 3
After checking the checkboxes for Launcher and System Path, I have clicked the Customize installation Link to choose the installation components and to change the installation path. It shows the components including Documentation, pip, tcl/tk and IDLE, Python test suite, py launcher, for all users as shown in Fig 4.

Fig 4
Click the Next Button to choose Advanced Options as shown in Fig 5.

Fig 5
I have selected the option to install it for all the users and also provided the custom installation location as shown in Fig 5. Now click the Install Button to start the installation. It will also ask for system permission to continue with the installation. Allow the installer to complete the installation. It will show the installation progress as shown in Fig 6.

Fig 6
It will show the success screen after completing the installation as shown in Fig 7.

Fig 7
Now click the Close Button to close the installer. This completes the installation step to install Python.
Step 3: Verify Installation
In this step, we will verify the installation of Python. Search for Python on system tray as shown in Fig 8. It will show all the available options.

Fig 8
Now execute the Python command-line option as highlighted in Fig 8. It will start the Python command line window as shown in Fig 9.

Fig 9
It shows that Python 3.8.1 is installed as part of this tutorial. We can also verify the version on Windows Command Prompt as shown in Fig 10.

Fig 10
This is how we can verify the installation of Python 3 on Windows 10.
Hello World
In this step, we will write our first program in Python to print Hello Python on the console.
Open any editor of your choice and write the basic program as shown below.
# Print Hello Python
print( "Hello Python" )
Now save the file. I have saved it as hello.py. We can simply execute it using the python command as shown in Fig 11.

Fig 11
Summary
In this tutorial, we have installed the most recent version of Python 3 i.e. Python 3.8.1 on Windows 10 and also executed our first program to print Hello Python on the console.

