In this post, we will discuss all the necessary steps to install the desktop version of Ubuntu 18.04 LTS, Bionic Beaver, using a bootable drive.
Pre-requisites - Ubuntu 18.04 recommends the mentioned hardware for smooth performance.
- 2 GHz dual-core processor or better
- 2 GB system memory (We at tutorials24x7 recommend at least 4 GB for regular operations and 8 GB for development purposes)
- 25 GB of free hard drive space
- A flash drive that has at least 4GB of space.
Step 1: Prepare Bootable Drive
In this step, we will prepare the bootable drive using Rufus on Windows 10. If you haven't done so yet, download Rufus from the official site. There are several other ways to prepare the bootable drive.
You can download the most recent version of Ubuntu from the official distribution or other versions from official releases.
Insert the flash drive.
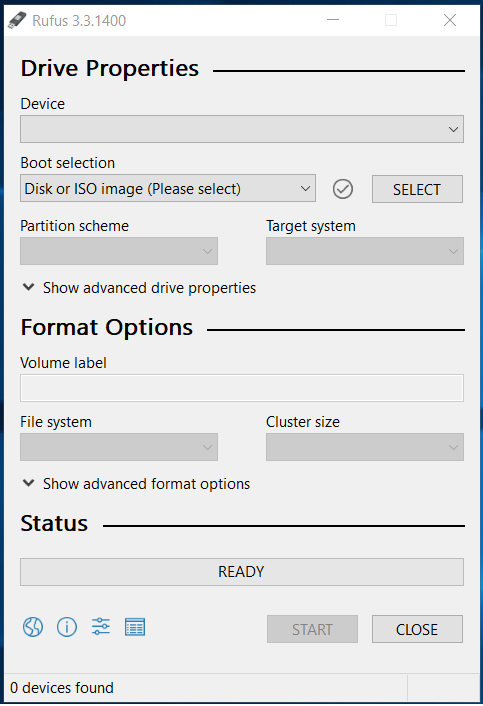
Start Rufus. It will show the Rufus window as displayed in Fig. 1.
Select the Flash Drive as the Device, the downloaded ISO as the Boot selection, MBR as the Partition scheme, and BIOS or UEFI as the Target system. The Rufus configuration should look like the one displayed in Fig. 2.
Now press the Start Button to start the bootable drive preparation.
Rufus will ask to download a few additional files, as displayed in Fig. 3.
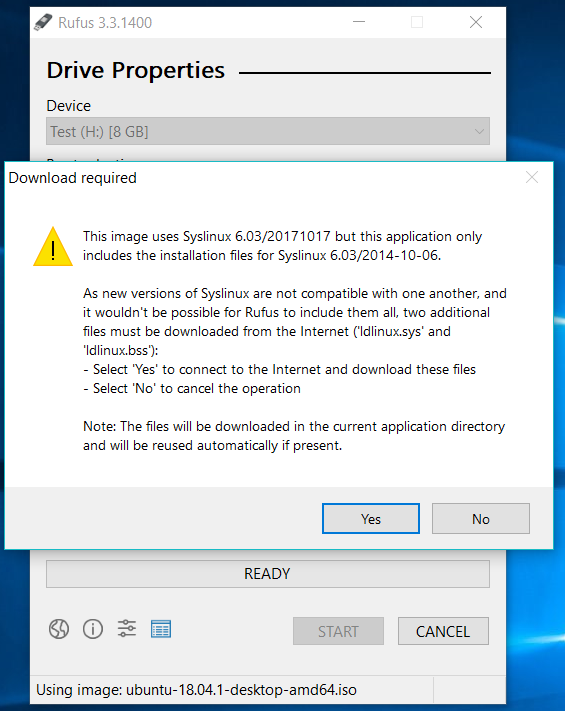
Fig. 3
Rufus will provide options to choose ISO type as displayed in Fig. 4.

Fig. 4
Finally, Rufus will show a warning to erase all the data on the flash drive, as displayed in Figure 5.

Fig. 5
A success screen will be displayed as shown in Fig. 6. Eject the drive on successful creation of Ubuntu 18.04 bootable drive.

Fig. 6
Step 2: Plugin Bootable Drive and Set Boot Priority
Now plug in the bootable drive prepared by us in Step 1 and boot the system. Most of the newer systems provide options to choose bootable media by pressing F10 while the system shows the flash screen. After pressing F10, we need to select the drive to boot from available options. Select the Flash Drive prepared by us in step 1 as shown in Fig. 7.
In some of the older systems, we might need to enter bios and update the boot priority.

Fig. 7
Step 3: Ubuntu Loader
The ubuntu loader screen will be displayed after system boots the bootable drive as shown in Fig. 8.

Fig. 8
As soon as loading completes, it shows the options to either try out the Ubuntu either by running it from the flash drive or install it on the system disk as shown in Fig. 9.

Fig. 9
Click on Install Ubuntu Button to start the installation. It shows Keyboard and Language selection screen as shown in Fig. 10.

Fig. 10
Click on Continue Button after selecting the Keyboard layout. It shows options to choose the wireless network. Do not select any network for now as shown in Fig. 11.
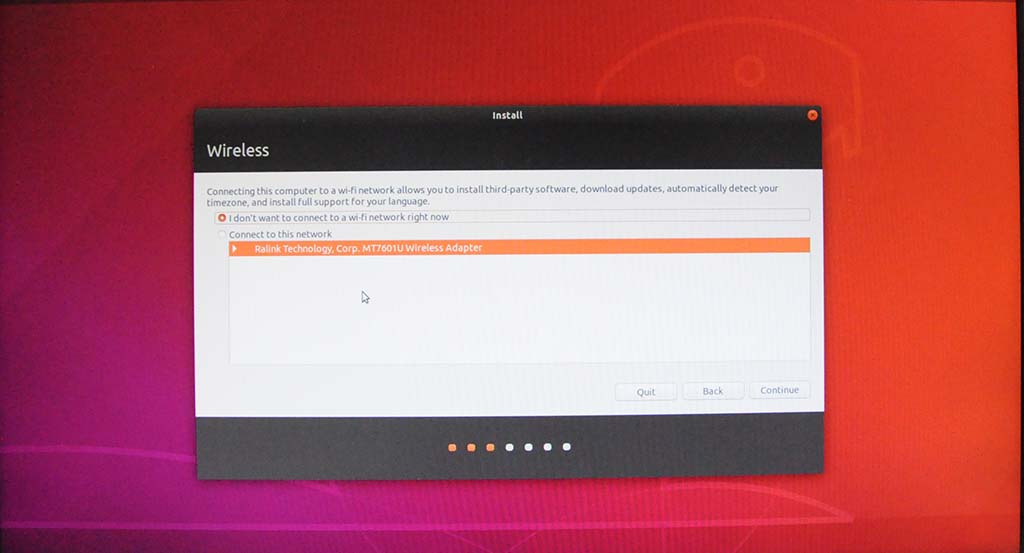
Fig. 11
Click on Continue Button to continue without selecting the network. Keep the default download options as shown in Fig. 12 and press Continue Button.
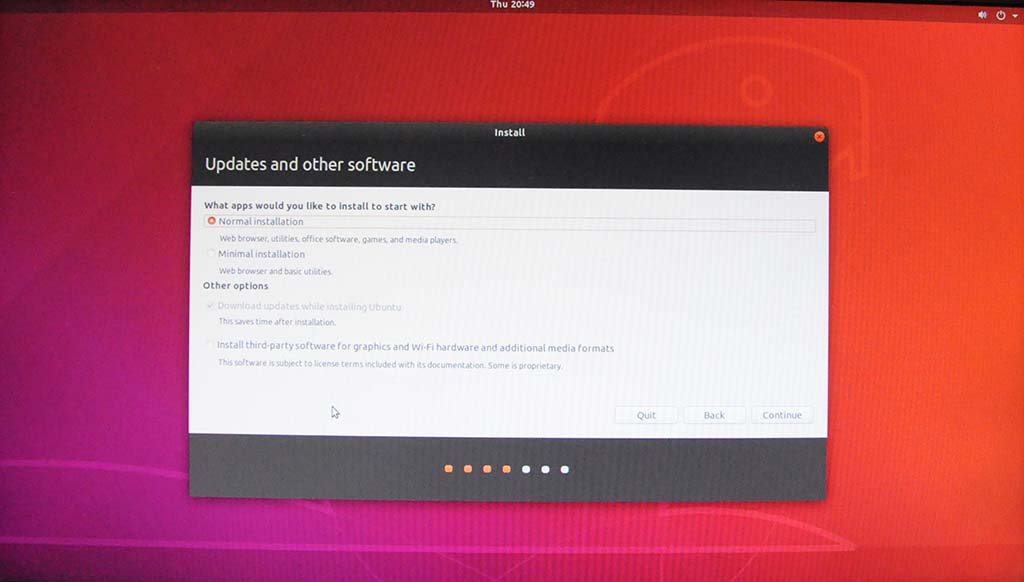
Fig. 12
Step 4: Disk Partitioning
In this step, we will partition the disk on an existing installation. The steps will be similar for a fresh installation on a new system.
Select installation type as Something else on Installation type screen as shown in Fig. 13.

Fig. 13
Press Continue Button. It will show us the empty disk on the new system, else shows the existing installation as shown in Fig. 14.

Fig. 14
Press New Partition Table Button to create MBR. We need to be careful to take backup of existing installation if required since it will erase all the existing data. After pressing Continue Button, it will erase all existing data and shows the disk as the new disk with free space according to disk capacity as shown in Fig. 15.

Fig. 15
Now click the Plus Button to add our first partition. We will create the swap of 2 GB as our first partition as displayed in Fig. 16.

Fig. 16
Press Ok Button to create the partition.
Again click the Plus Button to add the root partition having Ubuntu installation as shown in Fig. 17. Select Ext4 as the file system which is most recent.

Fig. 17
Similarly, create other partitions as shown in Fig. 18.

Fig. 18
You might create different partitions according to your needs. The partitioning done by me is shown in Fig. 19.

Fig. 19
Now click Install Now Button to start installation on the root partition. It will show a warning dialog before starting the formatting of the disk and installation of Ubuntu on the root partition as shown in Fig. 20.

Fig. 20
Step 5: System Settings
After successful formatting, it will continue installing the Ubuntu on the root partition and ask location as shown in Fig. 21.

Fig. 21
Click on your location to select system timezone.
Click Continue Button after selecting system timezone. The installer will ask user details on the next screen as shown in Fig. 22. Fill all the user details and choose a secure login password. Also, disable auto login as shown in Fig. 22. Click Continue Button to continue the installation.

Fig. 22
Step 6: Finish Installation
After completing system settings in Step 6, the installer will continue copying files and installing default packages as shown in Fig. 23 and Fig.24.

Fig. 23

Fig. 24
It will take a while to complete the installation. At last, it will show a dialog to notify the completion of installation. It also asks to reboot the system as shown in Fig. 25.

Fig. 25
Step 7: Reboot and Verify Partitions
On reboot, it will show Ubuntu Loader as shown in Fig. 26 and Users Screen to show the available users as shown in Fig. 27. Select the user created by us in Step 7 and login using the password. We can also log in as Guest.

Fig. 26

Fig. 27
After first login, it shows the Ubuntu Guide having few steps to update the user about Bionic Beaver as shown in Fig. 28.

Fig. 28
Now click on Applications Icon at the bottom left to open Applications window. Scroll to the bottom to view the Terminal Application as shown in Fig. 29.

Fig. 29
Click on the Terminal Application icon to start the terminal and type the command df -h to check disk status. It shows all the partitions created by us with mount point, total disk size and available disk size as shown in Fig. 30.
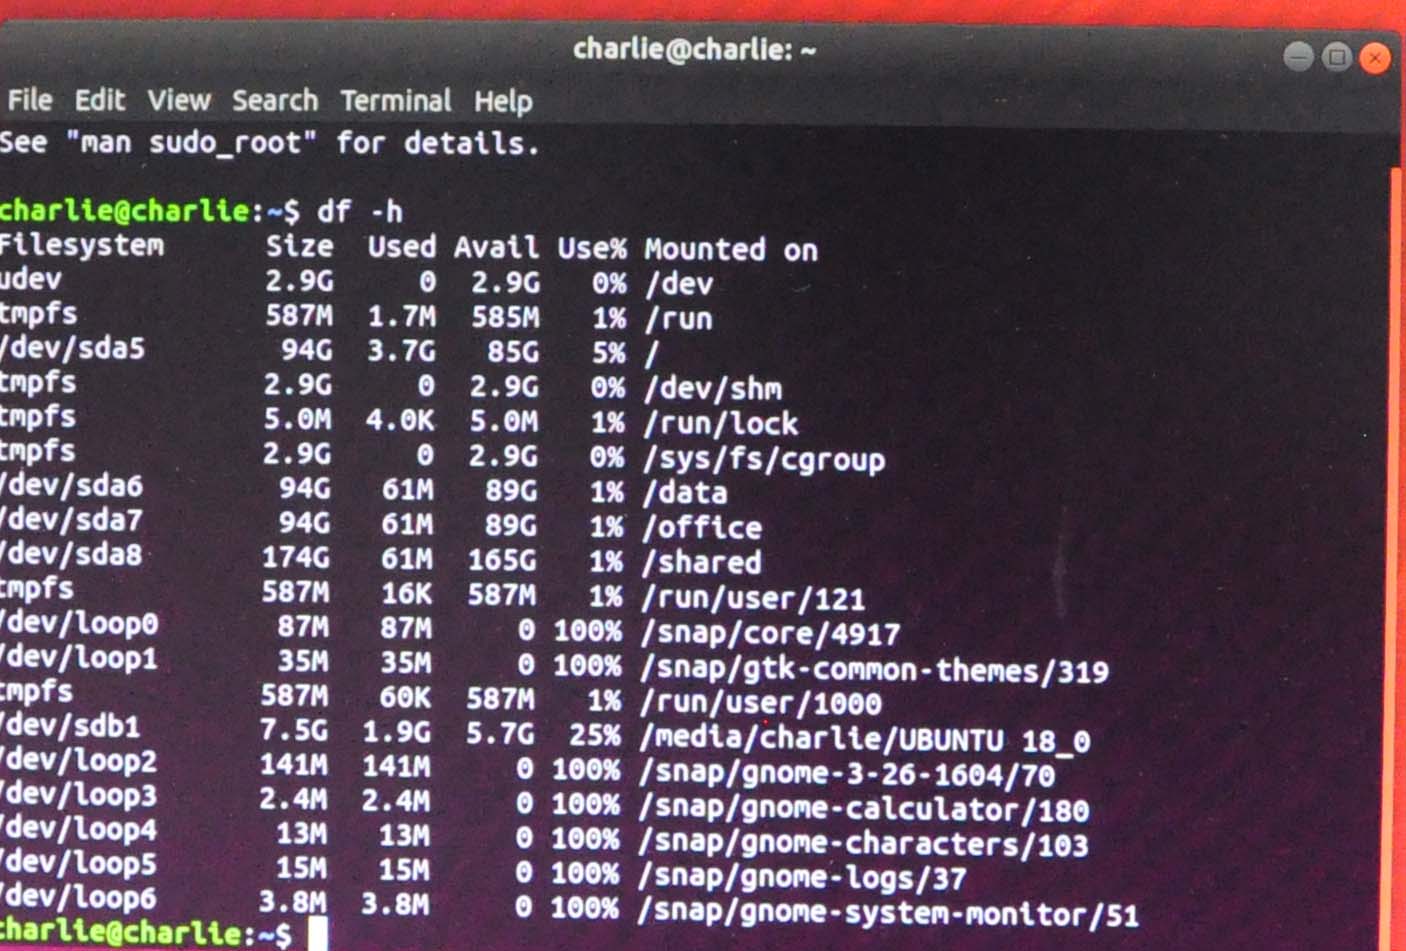
Fig. 30
This is all about installing and partitioning Ubuntu 18.04 LTS - Bionic Beaver.

