Ubuntu is among the popular operating systems used for production and development purposes. It might be required to try it out or run in the dual-mode without allocating dedicated hardware to it. We can run it as a guest operating system on the Windows Operating System using the Oracle VM VirtualBox without actually installing it on dedicated hardware. This tutorial provides all the steps required to install Ubuntu 18.04 LTS as a guest operating system on Windows 10 using the Oracle VM VirtualBox 6. The steps should be similar for other Linux operating systems.
Notes: Make sure that your Windows is 64-bit for optimal output and at least 16GB of memory is installed on the system having a multi-core processor to install Ubuntu On VirtualBox.
Prerequisites
This tutorial assumes that you have access to Windows System with at least 8 GB of memory and VirtualBox is already installed on it for optimal performance of Ubuntu On VirtualBox. You can also follow How To Install VirtualBox On Windows.
Download Ubuntu
Open the Official Page to download the most recent version of Ubuntu Desktop. It provides the options to download Ubuntu Desktop as shown in Fig 1.

Fig 1
Create Virtual Machine
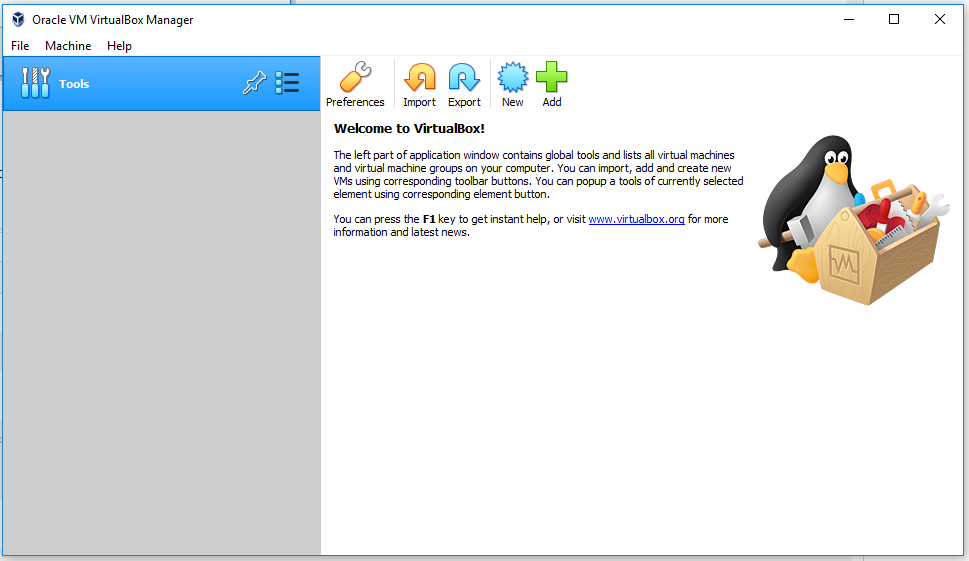
In this step, we will create the Virtual Machine by specifying the OS type, Memory, and Hard Disk used to install Ubuntu On VirtualBox. The Home Screen of VirtualBox is shown in Fig 2.

Fig 2
Click the Machine Option on the Main Menu and click New Button as highlighted in Fig 3.

Fig 3
It will show the Create Virtual Machine Dialog to fille the options including Name, Destination, Type, and Version as shown in Fig 4.

Fig 4
Click the Next Button to configure the memory as shown in Fig 5.

Fig 5
I have allocated 4GB to the Virtual Machine leaving 12GB for the Windows Operating System. You might be required to choose either low or high memory depending on the total memory available on your system.
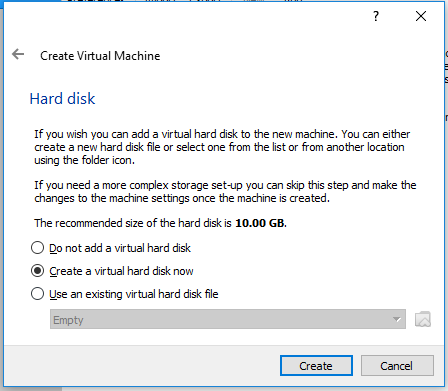
Now click the Next Button to configure Disk Space as shown in Fig 6.

Fig 6
I have selected the option to create a virtual hard disk as shown in Fig 6. Now click the Create Button. It shows the options to choose hard disk type as shown inFig 7.

Fig 7
I have kept the option VDI file type selected as shown in Fig 7. Now click the Expert Mode Button to change the size of Hard Disk as shown in Fig 8.

Fig 8
Change the disk size based on the space available on your disk and the need for the Virtual Machine. Click the Create Button to create the virtual hard disk. It will finalize our virtual machine and add it to the VirtualBox list of VMs as shown in Fig 9.

Fig 9
Install Ubuntu
In this step, we will install Ubuntu On VirtualBox using the virtual machine created by us in the previous step. Click the Start Button to start the virtual machine as highlighted in Fig 10.

Fig 10
It will ask for the start-up disk as shown in Fig 11. Click the Disk Icon to choose the Disk. Also, create the Add Button to choose the ISO downloaded by us in the first step of this tutorial. Now click the Choose Button to select the disk added by us.

Fig 11
Notes: In case you face any issue in choosing the ISO file at the first attempt, you might be required to delete the VM and re-create it. The ISO will be selected by default on the first launch of the VM as shown in Fig 12.

Fig 12
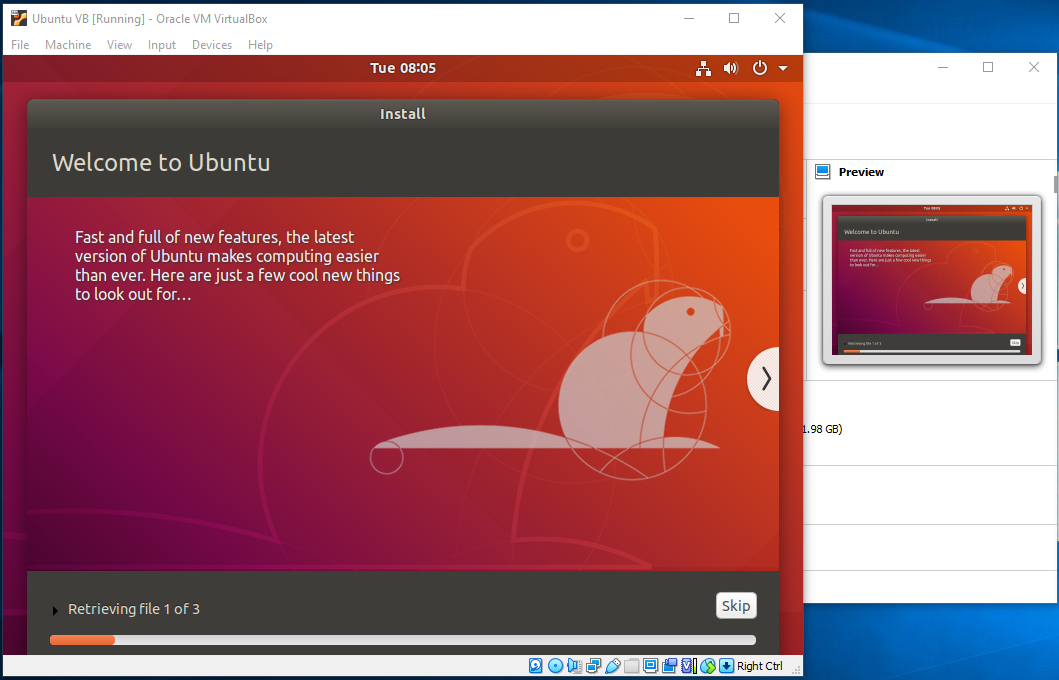
Now click the Start Button to start installing Ubuntu on the Virtual Machine created by us. It will load the ISO file and start installing Ubuntu as shown in Fig 13.

Fig 13
Now choose the language of your choice and click the Install Ubuntu Button to start installing Ubuntu on the virtual machine. It will ask to choose the Keyboard Layout on the next screen as shown in Fig 14.

Fig 14
Click the Continue Button to choose Installation Type as shown in Fig 15.

Fig 15
Click the Continue Button to confirm the installation on the next screen as shown in Fig 16.

Fig 16
Click the Install Now Button to start installing Ubuntu on the virtual machine using the options selected by us in the previous steps. It will ask to confirm disk changes as shown in Fig 17.

Fig 17
Click the Continue Button to apply the disk changes. The next screen provides options to choose the region as shown in Fig 18.

Fig 18
Choose the region of your choice and click Continue Button. The next screen provides options to configure user account as shown in Fig 19.

Fig 19
Fill all the User details and click Continue Button. It will show the installation progress as shown in Fig 20.

Fig 20
It will ask to restart the system after completing the installation as shown in Fig 21.

Fig 21
Click the Restart Now Button to restart the VM. It will ask to remove the installation medium for the first time as shown in Fig 22.

Fig 22
Simply hit the Enter Key to reboot Ubuntu. It will show the Welcome Screen having users list as shown in Fig 23.

Fig 23
Click the User and Login to the system from the Login Screen as shown in Fig 24.

Fig 24
Click the Sign In Button. It will show the getting familiar dialogs as shown in Fig 25.

Fig 25
Go through all the dialogs and close them one by one. After closing all the dialogs, it will show the Desktop as shown in Fig 26.

Fig 26
This is all about installing Ubuntu as a guest operating system using VirtualBox on Windows.
Guest Additions
We can install the Guest Additions on Ubuntu by following Install Guest Additions On Ubuntu On VirtualBox.
Pause, Resume, Shut Down, Configure, Start
We can pause the virtual machine and resume it back using the Pause Option. Click the Machine Menu and Pause Button to pause it as shown in Fig 27.

Fig 27
Again click the Pause Option to resume the virtual machine. Now close the Window to either save the machine state or power off. It will ask to save the machine state or power off as shown in Fig 28.

Fig 28
Now click the OK Button with the option Save the machine state selected as shown in Fig 28. It will save the machine state as shown in Fig 29 so that we can resume it from the same state where we left it. Now we can close the VirtualBox after saving the machine state.

Fig 29
Now click the Start Icon and choose Normal Start Option to again start the Virtual Machine and resume it where we have left it while saving its state. It will show the resume progress as shown in Fig 30 and brings Ubuntu back to the same position where it was saved.

Fig 30
We can also power off the virtual machine by selecting the Power off the machine Option as shown in Fig 28. It will shut down Ubuntu and also power off the virtual machine as shown in Fig 31.

Fig 31
Click the Start Icon and choose Normal Start Option to again start the Virtual Machine. It will show the Login Screen this time instead of the machine state as shown in Fig 32.

Fig 32
Summary
This tutorial explained the steps required to download the Ubuntu Desktop Image from the official website of Ubuntu. It also explained the steps to create a virtual machine and install Ubuntu On VirtualBox. This comes handy in several situations when we do not have options to install Ubuntu directly on the hardware. Keep commenting to join the discussion about installing Ubuntu as a virtual machine on VirtualBox using the comment options as shown below.

