Sometimes, we might be required to migrate the Virtual Machine on VirtualBox to other virtualization tools including VMware Workstation Player, VMware Fusion, etc. The Virtual Machine on the VirtualBox must be exported to the Open Virtualization Format (OVF) understood by other virtualization tools. This tutorial provides the steps required to export the Virtual Machine on VirtualBox using VDI, VHD, VMDK, etc to OVF.
Notes: I have used the Ubuntu 18.04 Virtual Machine in this tutorial for demonstration purposes. The steps should be the same for other guest operating systems.
Power Off the Virtual Machine
We must power off the virtual machine before starting the export process. It ensures that the guest operating system will boot normally while importing to other virtualization tools. The Ubuntu system on VirtualBox can be shutdown by following Fig 1, Fig 2, and Fig 3.

Fig 1

Fig 2

Fig 3
Export to OVF
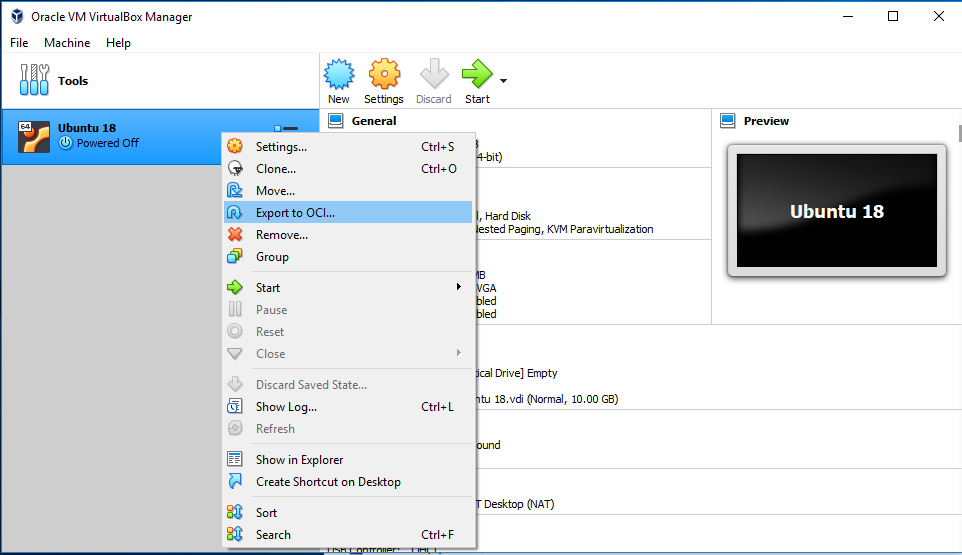
In this step, we will export the Virtual Machine to Open Virtualization Format (OVF). Highlight or select the Virtual Machine and right-click on it. Now click Export to OCI as shown in Fig 4.

Fig 4
It shows the options to export the Virtual Machine to OVF as shown in Fig 5.

Fig 5
Keep Open Virtualization Format 1.0 selected for maximum compatibility with other virtualization tools as shown in Fig 5. Now click the Next Button to start exporting the virtual machine. The next screen provides options to update the virtual machine details as shown in Fig 6.

Fig 6
Out of all the fields, the name is the only mandatory field. Fill the other details if required and click the Export Button. It will ask to choose the virtual machine location. Now choose the appropriate location to save the virtual machine and it will show the export progress as shown in Fig 8.

Fig 7
Summary
This tutorial provided all the steps required to export the virtual machine from the VirtualBox to Open Virtualization Format (OVF).

