In this tutorial, we will discuss the steps required to add Shortcut keys in GIMP. We will add a shortcut to resize the image for demonstration purpose.
Step 1: Open Preferences Dialog
Click on Edit Button on Top Menu Bar and then click on Preferences option as shown in Fig 1.

Fig 1
It shows the Preferences Dialog as shown in Fig 2. We can directly go to Keyboard Shortcuts by clicking on the Keyboard Shortcuts Option as shown in Fig 1.

Fig 2
Step 2: Open Keyboard Shortcuts Panel
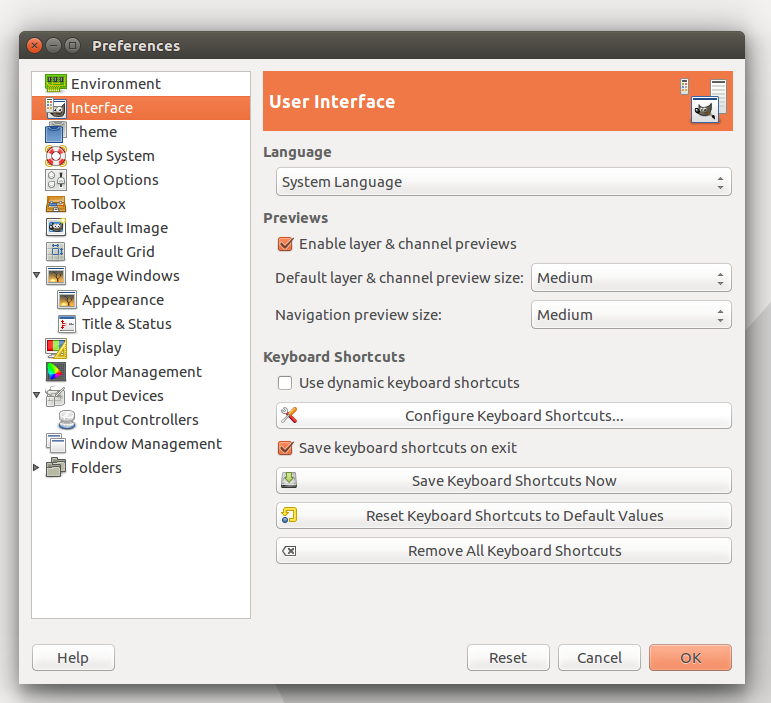
Now click on the Interface Option on Left Panel. It shows several options including a button to add a shortcut as shown in Fig 3.

Fig 3
Click on the Configure Keyboard Shortcuts Button keeping Save keyboard shortcuts on exit checkbox checked as shown in Fig 3.
Step 3: Configure Keyboard Shortcut
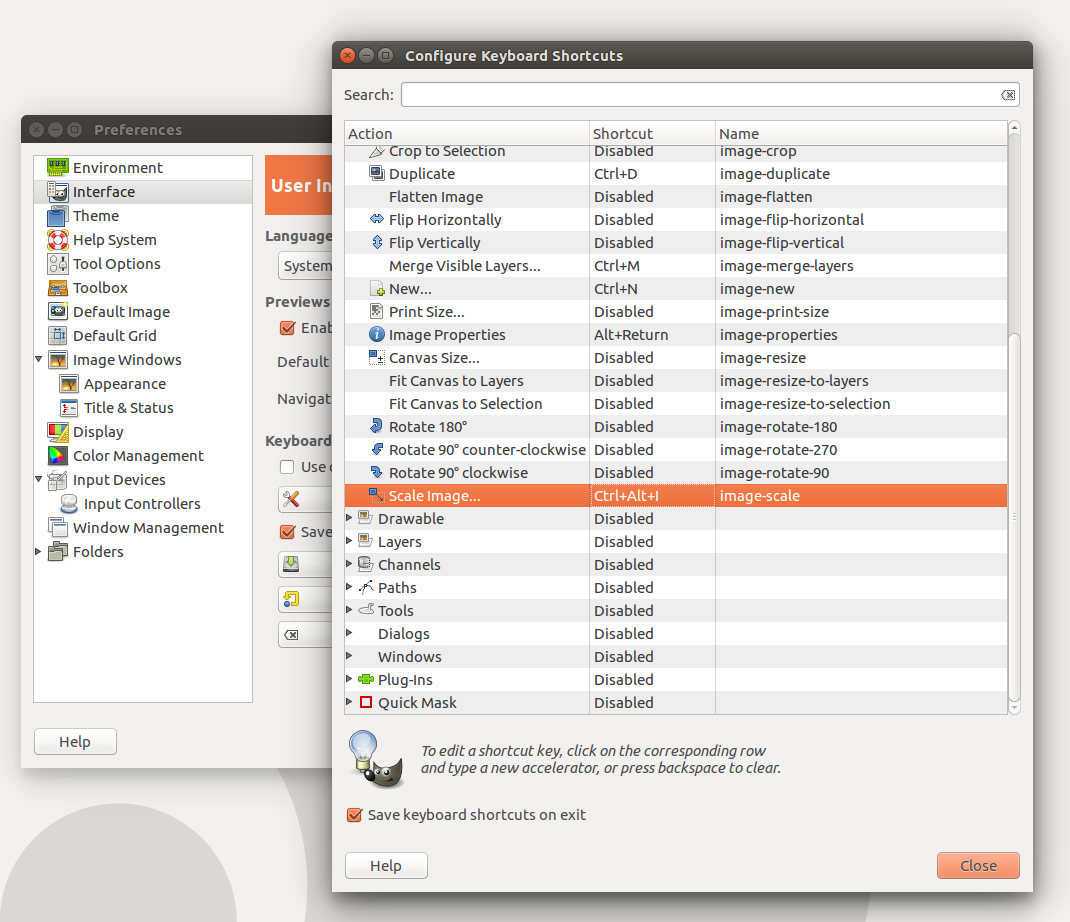
Expand the Image option and keep Scale Image selected as shown in Fig 4.

Fig 4
Now press the combination of keys to record the shortcut. I have used Ctrl + Alt + I as shown in Fig 5.

Fig 5
Click on Close Button to save the shortcut and click on Ok Button to close the preferences dialog.
Now open an image and press Ctrl + Alt + I. It will show the options to resize an Image as shown in Fig 6.

Fig 6
These are the steps required to add a keyboard shortcut in GIMP.

