VMware Workstation Player is a desktop virtualization application and freely available for personal and non-commercial use. It can be used to run virtual machines. We can run only one virtual machine at a time using the player. The existing and running virtual machine should be closed before switching to another virtual machine. This tutorial provides all the steps required to install VMware Workstation Player on Ubuntu 18.04 LTS. The steps should be similar on other Linux systems.
Notes: VMware Workstation Player and VMware Workstation Pro are the two variants where the Workstation Pro is paid and for advanced usage including multiple VMs at once, Snapshots, Advanced Networking, Virtual Machine Cloning, etc.
Download VMware Workstation Player
We can freely download the VMware Workstation Player from the Official Website. It shows the download options for both Windows and Linux as shown in Fig 1.

Fig 1
Click the Download Now Link for Linux as highlighted in Fig 1. It will start downloading the most recent version of VMware Workstation Player for Linux.
Prepare the System
Install the build-essential using the command as shown below.
# Install build-essential
sudo apt install build-essential
Install VMware Workstation Player
In this step, we will install the VMware Workstation Player on Ubuntu using the VMware Bundle downloaded by us in the previous step. Now execute the bundle to start installing the player on Ubuntu as shown below.
# Make the bundle executable
sudo chmod +x VMware-Player-15.5.2-15785246.x86_64.bundle

# Execute the Bundle
sudo ./VMware-Player-15.5.2-15785246.x86_64.bundle
The above-mentioned commands will install VMware on Ubuntu as shown in Fig 2.

Fig 2
Start VMware Player
We can start the VMware Player on Ubuntu by clicking the menu icon at the left bottom of Ubuntu as highlighted in Fig 3. It will show all the applications installed on the system. I have also highlighted the VMware Player installed by us in Fig 3.

Fig 3
We can start the VMware Player by clicking the launcher icon. It will show the Welcome Screen as shown in Fig 4.

Fig 4
Complete The Installation
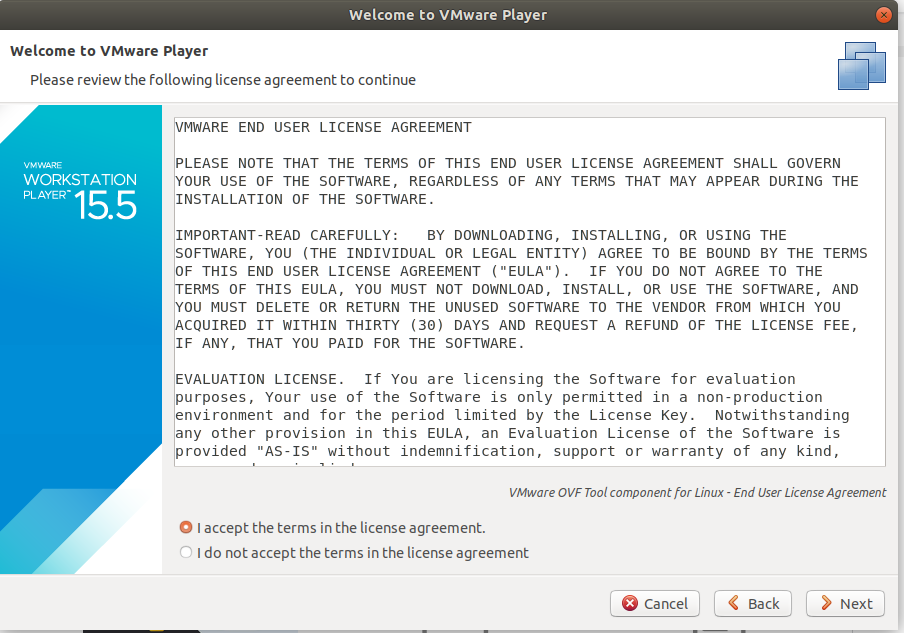
We also need to complete the installation of the VMware Player for the first time. Now accept the License Agreement as shown in Fig 4 and click the Next Button. The next screen asks to accept the License Agreement of VMware OVF Tool component for Linux as shown in Fig 5.

Fig 5
Accept the License Agreement and click Next Button. The next screen provides options to allow VMware to check for updates on startup as shown in Fig 6.

Fig 6
Choose the appropriate option and click the Next Button. The next screen asks to join the CEIP from VMware as shown in Fig 7.

Fig 7
Choose the appropriate option and click the Next Button. The next screen provides options to choose the license type among the commercial or free and non-commercial as shown in Fig 8. You may provide a valid license key in case the installation is for commercial usage.

Fig 8
I have selected the free for non-commercial option as shown in Fig 8. Now click the Finish Button to complete the setup. It will show popup having VMware Player information and the option to upgrade the Player. Close the information popup and upgrade the player if required.

Fig 9
The Home Screen of the VMware on Ubuntu is shown in Fig 10.

Fig 10
Now start creating the Virtual Machines of the Operating System to be installed on Ubuntu.
Summary
This tutorial provided all the steps required to install VMware Workstation Player on Ubuntu 18.04 LTS using the official installer. You can join the discussion on VMware Player installation either by directly submitting the comments to Tutorials24x7 or use Disqus.

