VMware Workstation Player is a desktop virtualization application and freely available for personal and non-commercial use. It can be used to run virtual machines. We can run only one virtual machine at a time using the player. The existing and running virtual machine should be closed before switching to another virtual machine. This tutorial provides all the steps required to install VMware Workstation Player on Windows 10.
Notes: VMware Workstation Player and VMware Workstation Pro are the two variants where the Workstation Pro is paid and for advanced usage including multiple VMs at once, Snapshots, Advanced Networking, Virtual Machine Cloning, etc.
Download VMware Workstation Player
We can freely download the VMware Workstation Player from the Official Website. It shows the download options for both Windows and Linux as shown in Fig 1.

Fig 1
Click the Download Now Link for Windows as highlighted in Fig 1. It will start downloading the most recent version of VMware Workstation Player for Windows.
Install VMware Workstation Player
In this step, we will install the VMware Workstation Player on Windows 10 using the executable downloaded by us in the previous step. Now execute the download to start installing the player on Windows. It will show the Welcome Screen as shown in Fig 1.

Fig 2
Click the Next Button to accept the License Agreement as shown in Fig 3.

Fig 3
Now click the Next Button to choose the installation location as shown in Fig 4.

Fig 4
You can either keep the default location else change it based on your preferences. Click the Next Button to choose the User Experience preferences as shown in Fig 5.

Fig 5
The next screen provides options to create the shortcuts as shown in Fig 6.

Fig 6
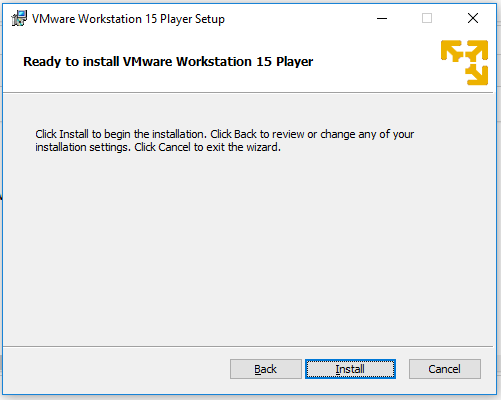
Now click the Next Button to confirm the installation as shown in Fig 7.

Fig 7
Click the Install Button to start the installation. It will show the installation progress and success message as shown in Fig 8 and Fig 9.

Fig 8

Fig 9
Now click the Finish Button to close the installer. This completes the installation of VMware Workstation Player installation on Windows 10.
Launch VMware Workstation Player
Now execute the player using the desktop launcher icon. It will ask to choose the license option for the first time as shown in Fig 10.

Fig 10
Choose the license option based on your usage of the player. The next screen confirms the selected license as shown in Fig 11.

Fig 11
Click the Finish Button to start the player. It will start the player and shows the Welcome Screen as shown in Fig 12.

Fig 12
Summary
This tutorial provided all the steps required to install VMware Workstation Player on Windows 10 using the official installer. You can join the discussion on VMware Player installation either by directly submitting the comments to Tutorials24x7 or use Disqus.

