VMware Tools is an optional set of drivers and utilities which is essential for optimal performance of the guest operating systems installed using the VMware Workstation Player. This tutorial provides the steps required to install VMware Tools on the Windows 10 guest operating system installed using VMware Workstation Player.
Without VMware Tools
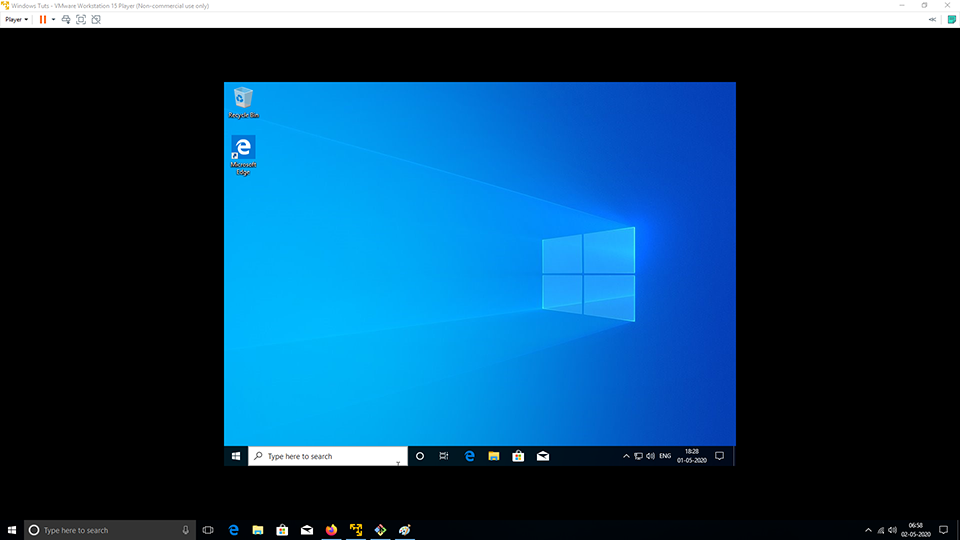
The default installation of Windows 10 on VMware Workstation Player without VMware Tools is similar to Fig 1.

Fig 1
If we maximize the Window, the screen occupied by Windows 10 remains the same as shown in Fig 2 and the same applies in full-screen mode. Similar to the display, the guest operating system won't give an optimal performance without VMware Tools.

Fig 2
Install VMware Tools
In this step, we will install VMware Tools on Windows 10 installed as a guest operating system on VMware Workstation Player. Click Player -> Manage -> Install VMware Tools as highlighted in Fig 3.

Fig 3
It will mount the DVD and starts the installer. In case it does not start the installation, open the Window and double click the VMware Tools DVD to start installing VMware Tools on Windows 10.

Fig 4
The system will ask for permission to continue the installation as shown in Fig 5.

Fig 5
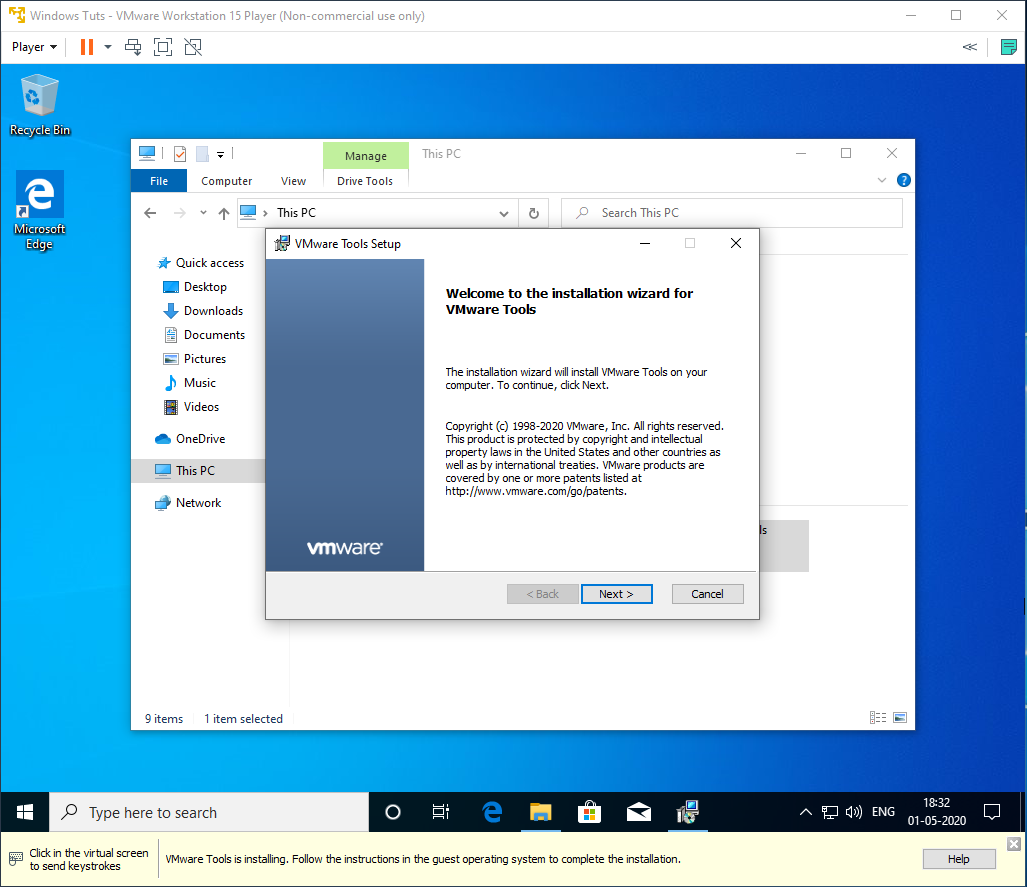
Allow the installer to continue the installation. It will show the Welcome Screen as shown in Fig 6.

Fig 6
Now click the Next Button to configure the installation as shown in Fig 7.

Fig 7
We can either continue with the Typical Installation or further configure it by choosing the Custom Installation Option. I have kept the Typical Option selected and clicked the Next Button to confirm the installation as shown in Fig 8.

Fig 8
Now click the Install Button to start the installation. It will show the installation progress as shown in Fig 9.

Fig 9
It will show the success message after completing the installation as shown in Fig 10.

Fig 10
Click the Finish Button to close the installation. It will ask to restart the system as shown in Fig 11.

Fig 11
Click the Yes Button to restart the system to apply the changes. This completes the installation of VMware Tools on Windows 10 installed as a guest operating system on VMware Workstation Player.
Now again maximize the window. Windows 10 should occupy the full area of the VMware Player Window as shown in Fig 12.

Fig 12
Summary
This tutorial provided all the steps required to install VMware Tools on Windows 10.

