In the previous tutorial, we have discussed installing VMware Workstation Player on Windows and Ubuntu 18.04 LTS on Windows 10 using the VMware Workstation Player. VMware is a virtualization tool that can be used to host multiple guest operating systems on the same system using virtual machines. The guest operating systems might not work properly with the default installation, hence it's preferred to install VMware Tools to get the optimal performance.
This tutorial provides the steps required to install VMware Tools on Ubuntu 18.04 LTS. The steps should be the same for other versions of Ubuntu. Also, note that the VMware Player installs VMware Tools in the easy mode which might not be the case for regular installation.
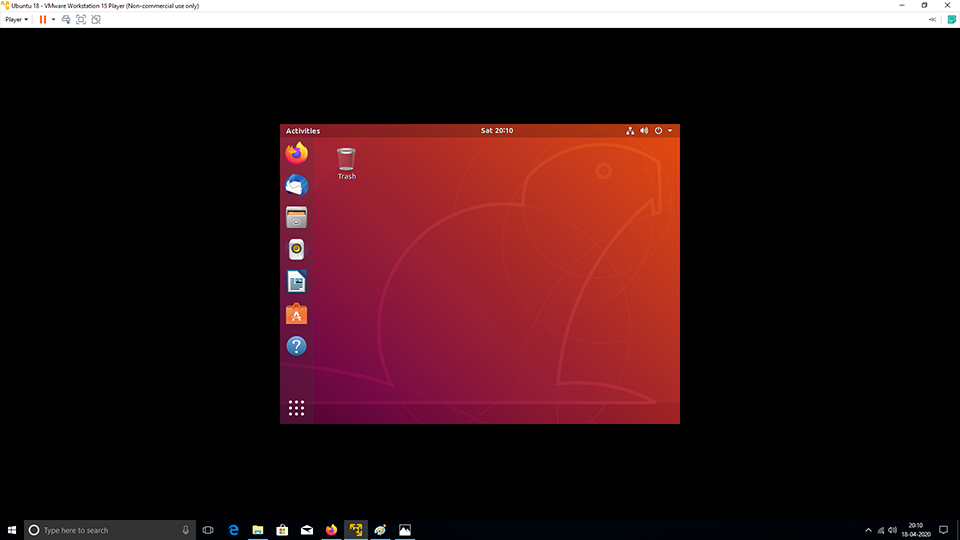
The most important feature of VMware Tools is Enhanced Graphics. The issue is shown in Fig 1 where Ubuntu does not occupy the full screen. The other features include sharing files and time synchronization between the guest and host operating systems. We can even copy and paste files by using drag and drop.

Fig 1
Install VMware Tools - Command Line
We can install VMware Tools on Ubuntu by using the official distribution from the Ubuntu repositories as shown below. It can be installed either for the Ubuntu Server or Ubuntu Desktop using the commands as shown below.
# Refresh the packages list
sudo apt update

# Install VMware Tools - Server
sudo apt install open-vm-tools

# Install VMware Tools - Desktop
sudo apt install open-vm-tools-desktop
Now restart the Ubuntu to apply the changes.
Install VMware Tools - ISO - Desktop
We can even install VMware Tools by using the DVD as shown in this section. In case you have already installed the VMware Tools on Ubuntu while following the previous section, you can simply skip this section.
Click Player -> Manage -> Install VMware Tools to mount the VMware Tools DVD as shown in Fig 2 and Fig 3.

Fig 2

Fig 3
Now copy the VMware Tools installer to your preferred location and extract it as shown in Fig 4 and Fig 5.

Fig 4

Fig 5
After extracting the installer, run the file vmware-install.pl as shown in Fig 6.

Fig 6
It will ask several questions and input while installing VMware Tools. Allow the installer to keep the default options and change it only where required. The progress of the installation is shown in Fig 7, Fig 8, and Fig 9.

Fig 7

Fig 8

Fig 9
The installer will show the success message after completing the installation as shown in Fig 10.

Fig 10
This is all about installing VMware Tools using the DVD. Now unmount the DVD and restart Ubuntu to apply the changes.
Install VMware Tools - ISO - Server
In case you have installed the Ubuntu Server using the VMware Workstation Player, the VMware Tools can be installed using the commands after mounting the ISO file as shown in Fig 2. Use the below-mentioned commands to install VMware Tools.
# Create directory to mount the CD Rom
sudo mkdir -p /data/setups/cdrom
sudo mkdir /data/setups/tools

# Mount the CD Rom
sudo mount /dev/cdrom /data/setups/cdrom

# Locate the Files
ls /data/setups/cdrom

# Copy the file name similar to VMwareTools-*.tar.gz
# In my case the file name was VMwareTools-10.3.21-14772444.tar.gz

# Extract the installer - Change the file name if it's different
sudo tar xzvf /data/setups/cdrom/VMwareTools-10.3.21-14772444.tar.gz -C /data/setups/tools

# Install Tools
cd /data/setups/tools/vmware-tools-distrib/
sudo ./vmware-install.pl -f
Also choose appropriate options to complete the installation as shown in Fig 7, Fig 8, and Fig 9. You may keep pressing Enter Key for most of the options to keep the defaults.
Summary
This tutorial provided all the steps required to install VMware Tools on Ubuntu 18.04 LTS using commands and DVD. If we maximize the window after installing VMware Tools, Ubuntu must also cover the entire screen as shown in Fig 11.

Fig 11

