Python has emerged as one of the major programming languages used to develop different types of applications including Web Applications, Desktop Applications, Numeric and Scientific Applications, etc. It soon entered into mainstream programming and majorly popular among data science engineers.
In this tutorial, we will discuss all the steps required to install Python 3 i.e. Python 3.9 on the popular macOS distribution Catalina. The steps should be the same for other distributions of macOS including Sierra, High Sierra, and Mojave.
Verify Python
The default installation of macOS Catalina ships with Python 2 by default. We can use the command python to check the Python version which is specifically used for Python 2. In this step, we will check the existing Python that ships by default with macOS Catalina using the commands as shown below.
# Check Python version
python --version

# Output
Python 2.7.16
We can see that Python 2 is available by default and Python 3 is not installed on macOS Catalina as shown in Fig 1.

Fig 1
It might show a dialog to install command line developer tools. Click the Cancel Button to hide the dialog. The next sections provide the steps to install the most recent version of Python using the installer.
Download Python 3 Installer
Open the Downloads Link having the list of available versions of Python as shown in Fig 2.

Fig 2
Now click the link Python 3.9.0. It shows further details about Python 3.9. Hover over Downloads and click Python 3.9.0 Download Button as highlighted in Fig 3.

Fig 3
Click the Download Button to start downloading the Python installer for Mac.
Install Python 3 using Installer
The Browser might ask to open the Python Installer as shown in Fig 4. You may either allow the Browser to start installing Python on your Mac machine, or download the installer and double click it to mount and start the installation.

Fig 4
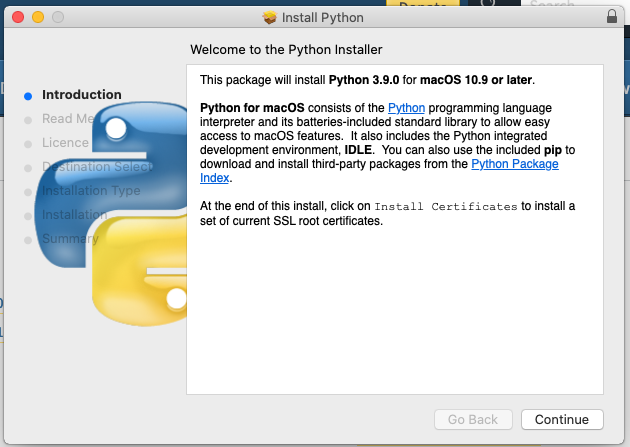
I have allowed the browser to start the installer. It shows the Introduction Screen as shown in Fig 5.

Fig 5
Now click the Continue Button to continue the installation of Python on macOS Catalina. The next screen shows additional information about the installation of Python as shown in Fig 6. Make sure to take a print of the details.

Fig 6
After saving the details, click the Continue Button. The next screen shows further details and a License as shown in Fig 7.

Fig 7
Now click the Continue Button to continue with the installation. It shows a Dialog to accept the License Agreement as shown in Fig 8.

Fig 8
Accept the License Agreement. The next screen shows details about the installation type as shown in Fig 9.

Fig 9
Click the Install Button. The installer asks for system permissions as shown in Fig 10.

Fig 10
Provide the Username and Password and click the Install Software Button. The installer shows the installation progress as shown in Fig 11.

Fig 11
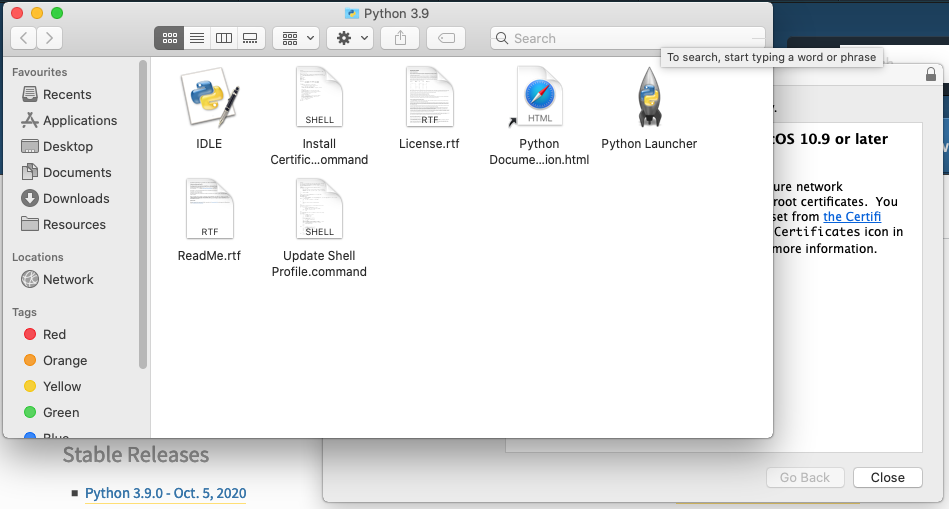
After completing the installation, it shows the installation files and success message as shown in Fig 12 and Fig 13.

Fig 12

Fig 13
Now close the Installer and re-open the terminal to check the version of Python 3 as shown in Fig 14.

Fig 14
This is how we can install the latest Python on macOS Catalina.
Hello World
In this section, we will write our first program in Python using the nano editor. Create a file helloworld.py and update the content as shown below.
# Print Hello World
print("Hello World !!")
Use the python3 installed by us to execute the program as shown below.
# Execute the program
python3 helloworld.py

# Program output
Hello World !!
These are the basic steps to write and execute Python programs.
Summary
This tutorial provided the steps to install Python 3.9 on macOS Catalina and also provided the steps to write and execute the first Python program.

