This post will discuss the steps required to install Incubating NetBeans 10 on Windows for PHP development. The incubating versions of NetBeans, 9 and 10, do not come with an installer; hence, we can either build it from the source or use the binary files provided by Apache. We will discuss the installation steps required to install it using the binary files distributed by Apache and write our first PHP program, Hello World.
This tutorial assumes that appropriate Java is already installed on the system. To install Java 14, OpenJDK 14, or Java 11, follow the steps published by Tutorials24x7.
You can also follow our tutorial How To Install NetBeans 11 for PHP on Ubuntu having details instructions to install NetBeans 11 on Ubuntu. Other similar posts include How To Install Aptana Studio For PHP Development On Windows and How To Install Eclipse for PHP on Windows.
You can also follow the newer version of this tutorial How To Install NetBeans On Windows (using Windows installer) or How To Install NetBeans 11 for PHP on Windows to install the newer version of NetBeans.
Step 1: Download Binary Distribution
Click Here to visit the download page having appropriate download links and instructions to verify the download as shown in Fig 1.

Fig 1
Step 2: Extract the Download
Now extract the downloaded zip and move it to the appropriate location. Also, locate the executable files as shown in Fig 2.

Fig 2
Step 3: Execute NetBeans
Create the desktop shortcut icon of executable file based on the Operating System processor type i.e. 32-bit or 64-bit. Use netbeans64.exe on 64-bit Windows.
Now execute the NetBeans to explore the all-new features provided by Apache.
Step 4: Import Settings
The newer version of NetBeans might ask to import settings of the previously installed version as shown in Fig 3.

Fig 3
It might also suggest/ask to install additional plugins as shown in Fig 4.

Fig 4
Accept the license agreement and install additional plugins as suggested by NetBeans.
NetBeans will also activate the plugins based on settings imported by it. In case the previous installation's active workspace was using PHP, Javascript, etc, it automatically activates the necessary plugins.
We can also enable the PHP and other plugins manually in case of fresh installation by clicking on Tools -> Plugins and selecting the Available Plugins Tab to choose and install the required plugins. Make sure that the PHP plugin is active for PHP development.
These are the basic steps required to install NetBeans and get it ready for PHP development. Now we will write our first program in PHP using newly installed NetBeans 10.
Step 5: Create
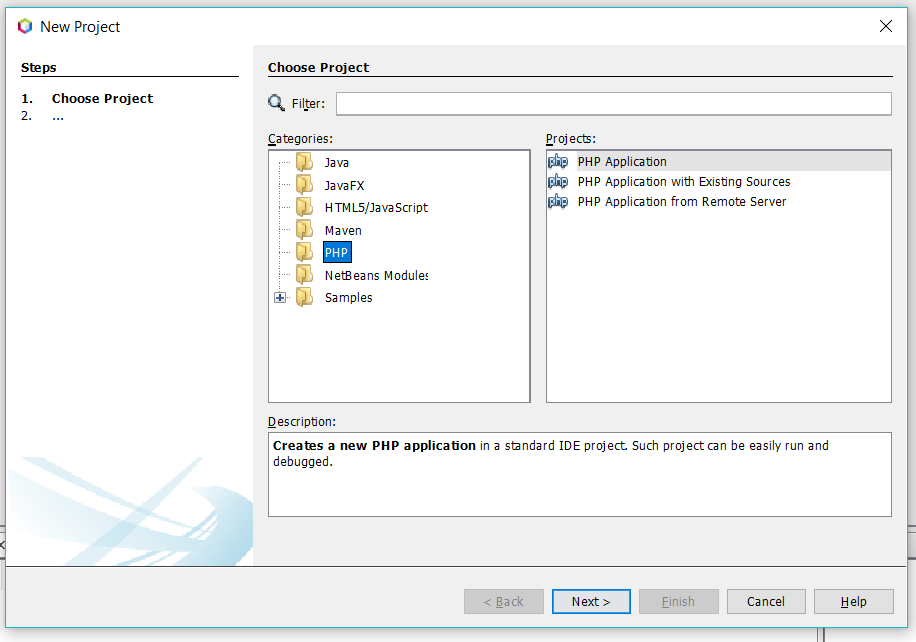
We need to create a project in order to start writing programs. Follow the below-mentioned steps to create a project as shown in Fig 5:
File -> New Project -> PHP -> PHP Application

Fig 5
Now click on Next Button to provide further details. Complete the project details as shown in Fig 6 and click on Next Button.

Fig 6
We will run our first project as a script by selecting the options as shown in Fig 7.

Fig 7
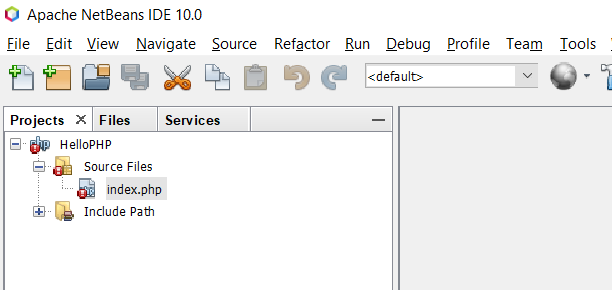
Click on Finish Button to complete project creation. The newly created project looks similar to the one shown in Fig 8.

Fig 8
Step 6: Write First Program
Now open the file index.php created by NetBeans and write Hello PHP using echo statement as shown in Fig 9.

Fig 9
Right click on index.php and click on Run to run the program as shown in Fig 10.

Fig 10
The final output will be displayed on the Output Panel as shown in Fig 11.

Fig 11
This is the easiest way to execute a PHP program and check the output on Console.

