In the previous tutorials, we have discussed the steps required to install WampServer, PHP 7 or PHP 8, and NetBeans 11 or NetBeans 12. We have also discussed the steps required to debug PHP programs in CLI mode as listed below.
- How To Install WampServer on Windows - The most recent version of WampServer while writing this tutorial supports up to PHP 7.3.1. The steps should be the same for the standalone installation of the Apache Web Server.
- How To Install NetBeans 11 for PHP on Windows OR How To Install NetBeans 12 for PHP on Windows
- How To Debug PHP In NetBeans On Windows.
In this tutorial, we will discuss all the steps required to remotely debug existing PHP web applications using Xdebug, NetBeans and WampServer installed on localhost. The steps should be similar to debug a remote server installed on another system or Virtual Machine (VM). Make sure that the debug port i.e. 9000 is open on the remote server.
A web application must be available within the www directory of the WampServer or Apache Web Server. You also need an FTP Server running on port 21 to complete this tutorial with a valid user having access to the web application directory. The FileZilla Server For Windows is used for this tutorial.
Create Remote Project
The very first step is to create a Remote Project in order to link NetBeans with an existing Remote Project i.e. the web application within the www directory of the WampServer or Apache Web Server. Click on File -> New Project or press Ctrl + Shift + N to create a project in NetBeans. It will show the New Project wizard as shown in Fig 1.

Fig 1
Also, select PHP under categories and PHP Application from Remote Server as the Project Option as shown in Fig 1. Click on the Next Button to navigate to the Name and Location step. It will show the Name and Location wizard as shown in Fig 2.

Fig 2
Provide the Project Name and Sources Folder based on your project needs. Also, select the appropriate PHP version matching with the version enabled in WampServer. Click the Next Button to configure the Remote Connection.

Fig 3
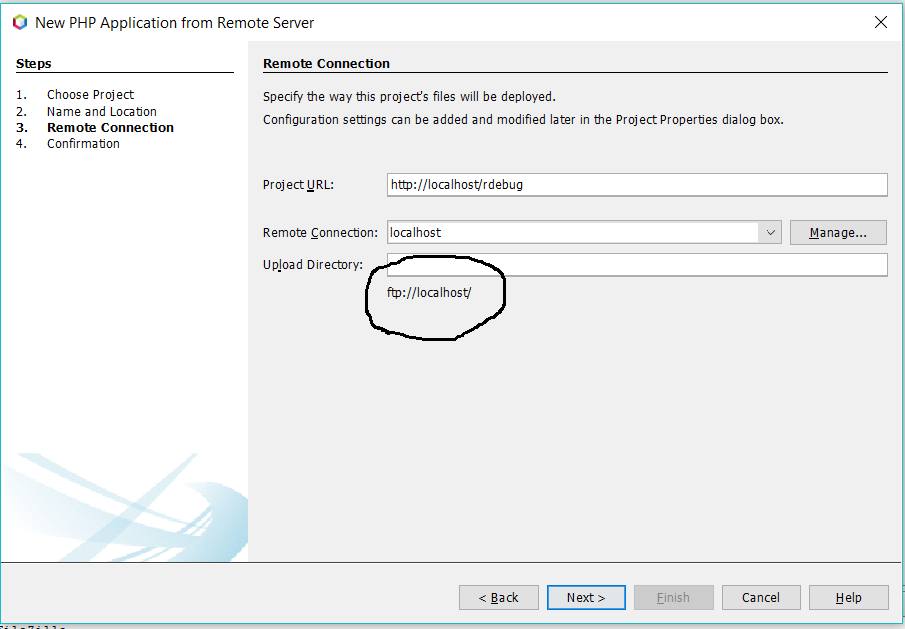
Specify the Project URL leaving Upload Directory blank as shown in Fig 3. We will be connecting to the root of the web application. Now click on the Manage Button in order to specify a Remote Connection. It will show Create New Connection dialog as shown in Fig 4.

Fig 4
Before moving ahead, make sure that a web application already exists and the appropriate FTP user has permission to read, write, and delete the files and directories as shown in Fig 5 for the FileZilla Server.

Fig 5
Specify the Connection Name and also choose Connection Type as shown in Fig 4. Click on the OK Button of Create New Connection Panel to confirm the connection name and type. The next wizard shows options to configure the FTP user details with the initial directory as shown in Fig 6.

Fig 6
After configuring the FTP user, click the Test Connection Button to test the FTP connection. It must show the success dialog as shown in Fig 7.

Fig 7
Click the OK Button to close the connection dialog. It must show the FTP location i.e. the root directory of the FTP user as highlighted in Fig 8.

Fig 8
Now click the Next Button to import the remote project files to the project created by NetBeans.

Fig 9
I have placed an empty index.php file to the web application directory which is also the root directory of the FTP user. Accordingly, NetBeans is showing the files available within the web application directory as shown in Fig 9. Now keep the files selected and click on the Finish Button to import remote project files to the NetBeans project.
So far, we have connected NetBeans to a remote web project using a valid FTP user having appropriate permissions to the project root directory on the remote server. A successful import should look like the one as shown in Fig 10.

Fig 10
Update Remote Project
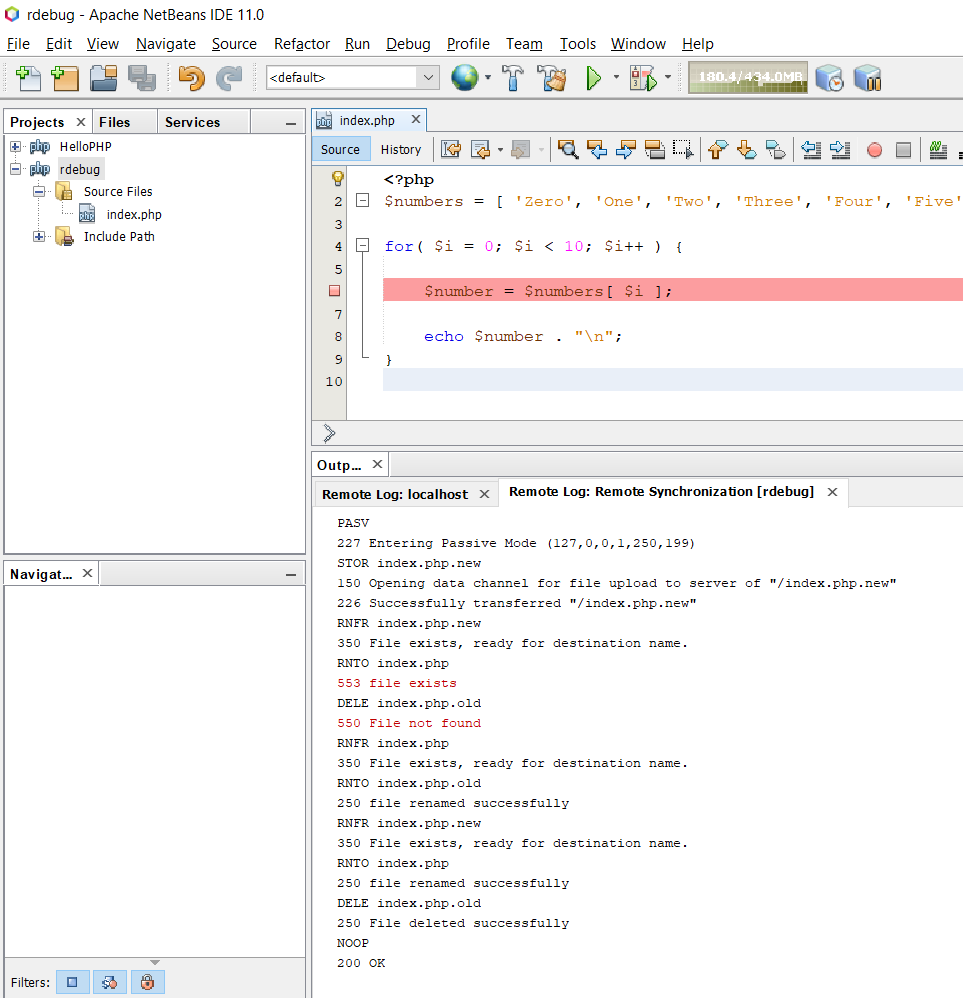
I have updated the index.php file having the same program as discussed in the previous tutorial to debug PHP in CLI mode. I have also created a breakpoint at line number 6 as shown in Fig 11.

Fig 11
Execute Remote Project
Now, right-click the index.php file and click on the Run Option or press Shift + F6 to execute the program. It will open the browser and shows the output as shown in Fig 12.

Fig 12
Debug Remote Project
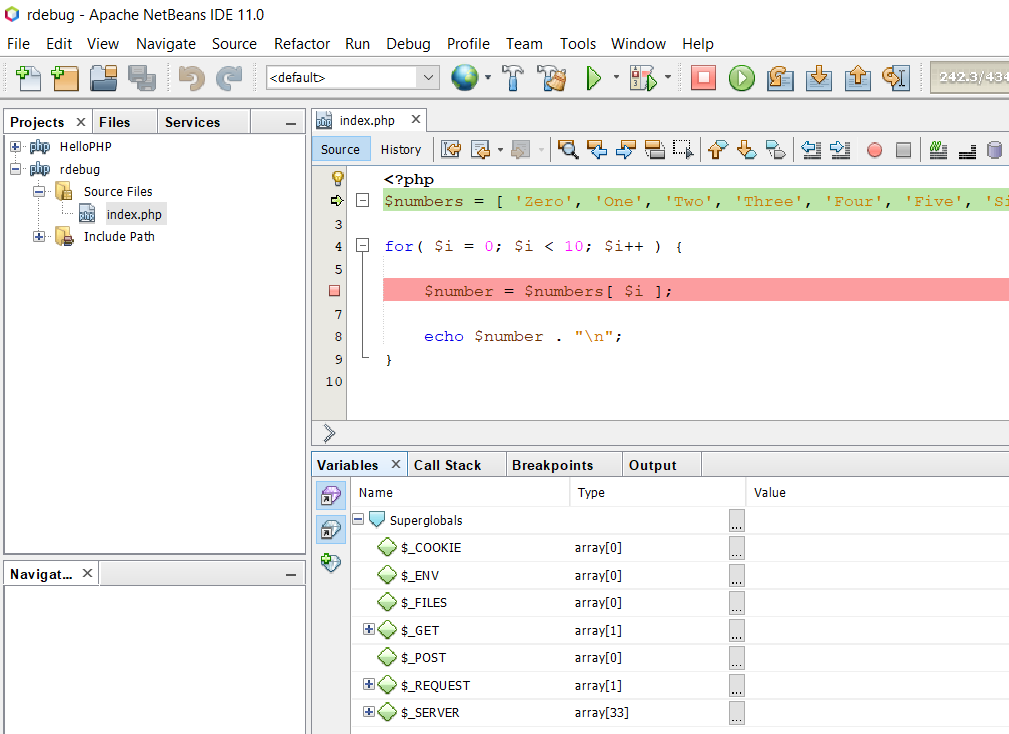
Now, right-click on the index.php file and click on the Debug Option or press Ctrl + Shift + F5 to start the debug session. It will open the browser and shows the blank screen without executing the program since the debugger will pause at the first line of the program as shown in Fig 13.
Note that the URL of the blank screen in debug mode is set to http://localhost/rdebug/index.php?XDEBUG_SESSION_START=netbeans-xdebug having the debug session associated with it.

Fig 13
Click the Continue Button and the debugger will pause at line number 6 having the next breakpoint as shown in Fig 14.

Fig 14
Now again press the Continue Button and the first iteration of the for loop will execute. The debug pointer will again stop at line number 6 i.e. the next breakpoint as shown in Fig 15. Similarly, we can use the other options including Step Into, Step Over, Step Out, and Run to Cursor to find the issues in the code.

Fig 15
Note that the value of $i is changed on the variables stack. In case we are sure that the issue is identified, we can remove the breakpoint and again press the Continue Button to complete the execution. The browser will halt until the execution completes and shows the output at the end.
This is how we can remotely debug a PHP web application using NetBeans and Xdebug by connecting to the project and downloading the remote code to the local project. We can make changes to the local project which will be synced with the remote project by NetBeans in order to reflect the changes on the remote web application.
Summary
This tutorial provided the reference links to install WampServer, PHP 7 or PHP 8, and NetBeans 11 or NetBeans 12. It provided all the steps required to remotely debug a PHP project using the NetBeans IDE.

